A SOUTH AFRICAN COOKBOOK · FIRST EDITION
THE TASTE OF HOME
✦

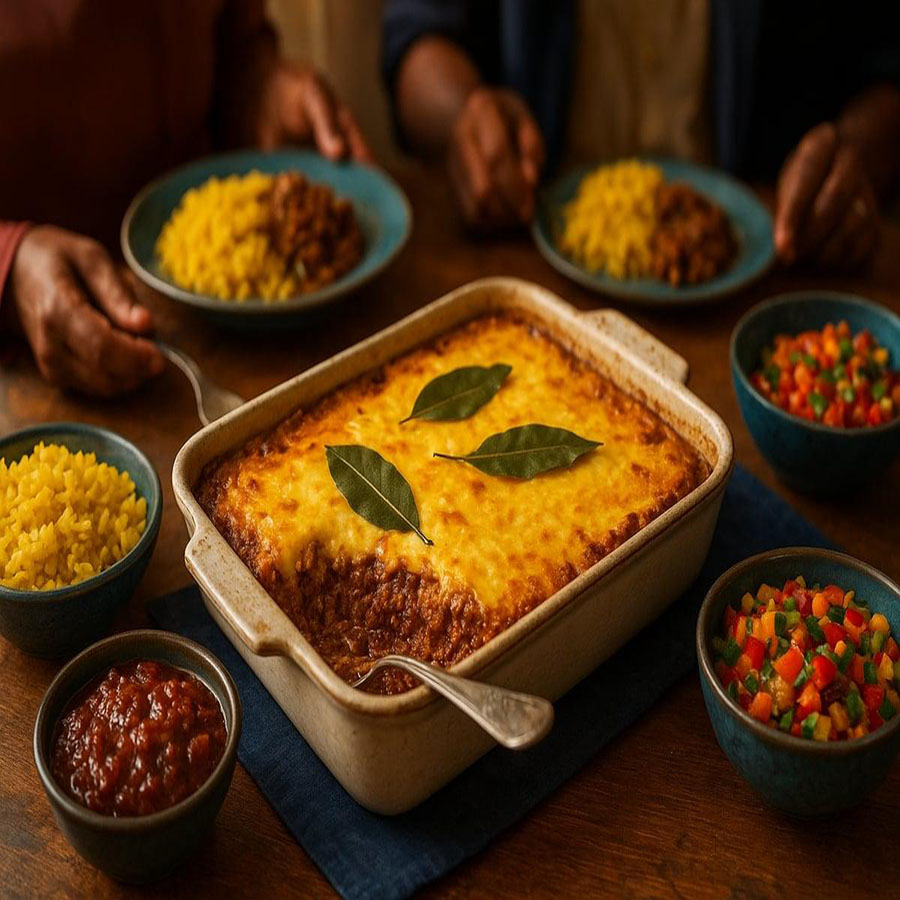
100 South African Recipes That Bring Us Together
Every home has a recipe worth remembering. Every family has a dish that brings everyone together. This is a celebration of those flavors, those memories, and the simple joy of sharing good food.
In South Africa, food has always been about more than simply satisfying our hunger. It is the sound of pots simmering on the stove, the familiar smell of Sunday lunch drifting through the house, and the laughter of family gathered around a table that never seems quite big enough for everyone. Food brings us together. It reminds us of where we come from, the people who raised us, and the moments that shaped our lives. Sometimes, all it takes is one familiar flavor to bring back a memory we thought we had forgotten.
South African cooking is a beautiful reflection of the people who call this country home. Our kitchens are filled with different cultures, traditions and generations of recipes, each adding something special to the way we cook and share our meals. From a hearty potjie slowly cooking over the coals to a golden milk tart cooling on the kitchen counter, from spicy curries and fragrant breyani to freshly baked vetkoek and a good old-fashioned braai, our food tells the story of a nation rich in flavor and tradition. This cookbook celebrates those everyday favorites and treasured family dishes.
Some of our fondest memories begin in the kitchen. The smell of freshly baked bread, a pot of curry simmering on the stove, the familiar sound of someone preparing Sunday lunch, or the excitement of gathering around the braai with family and friends. These are the moments that make a house feel like home. They remind us that the best meals are not always the most expensive or complicated. Sometimes, the simplest dishes, prepared with love and shared with the people who matter most, become the ones we remember forever.
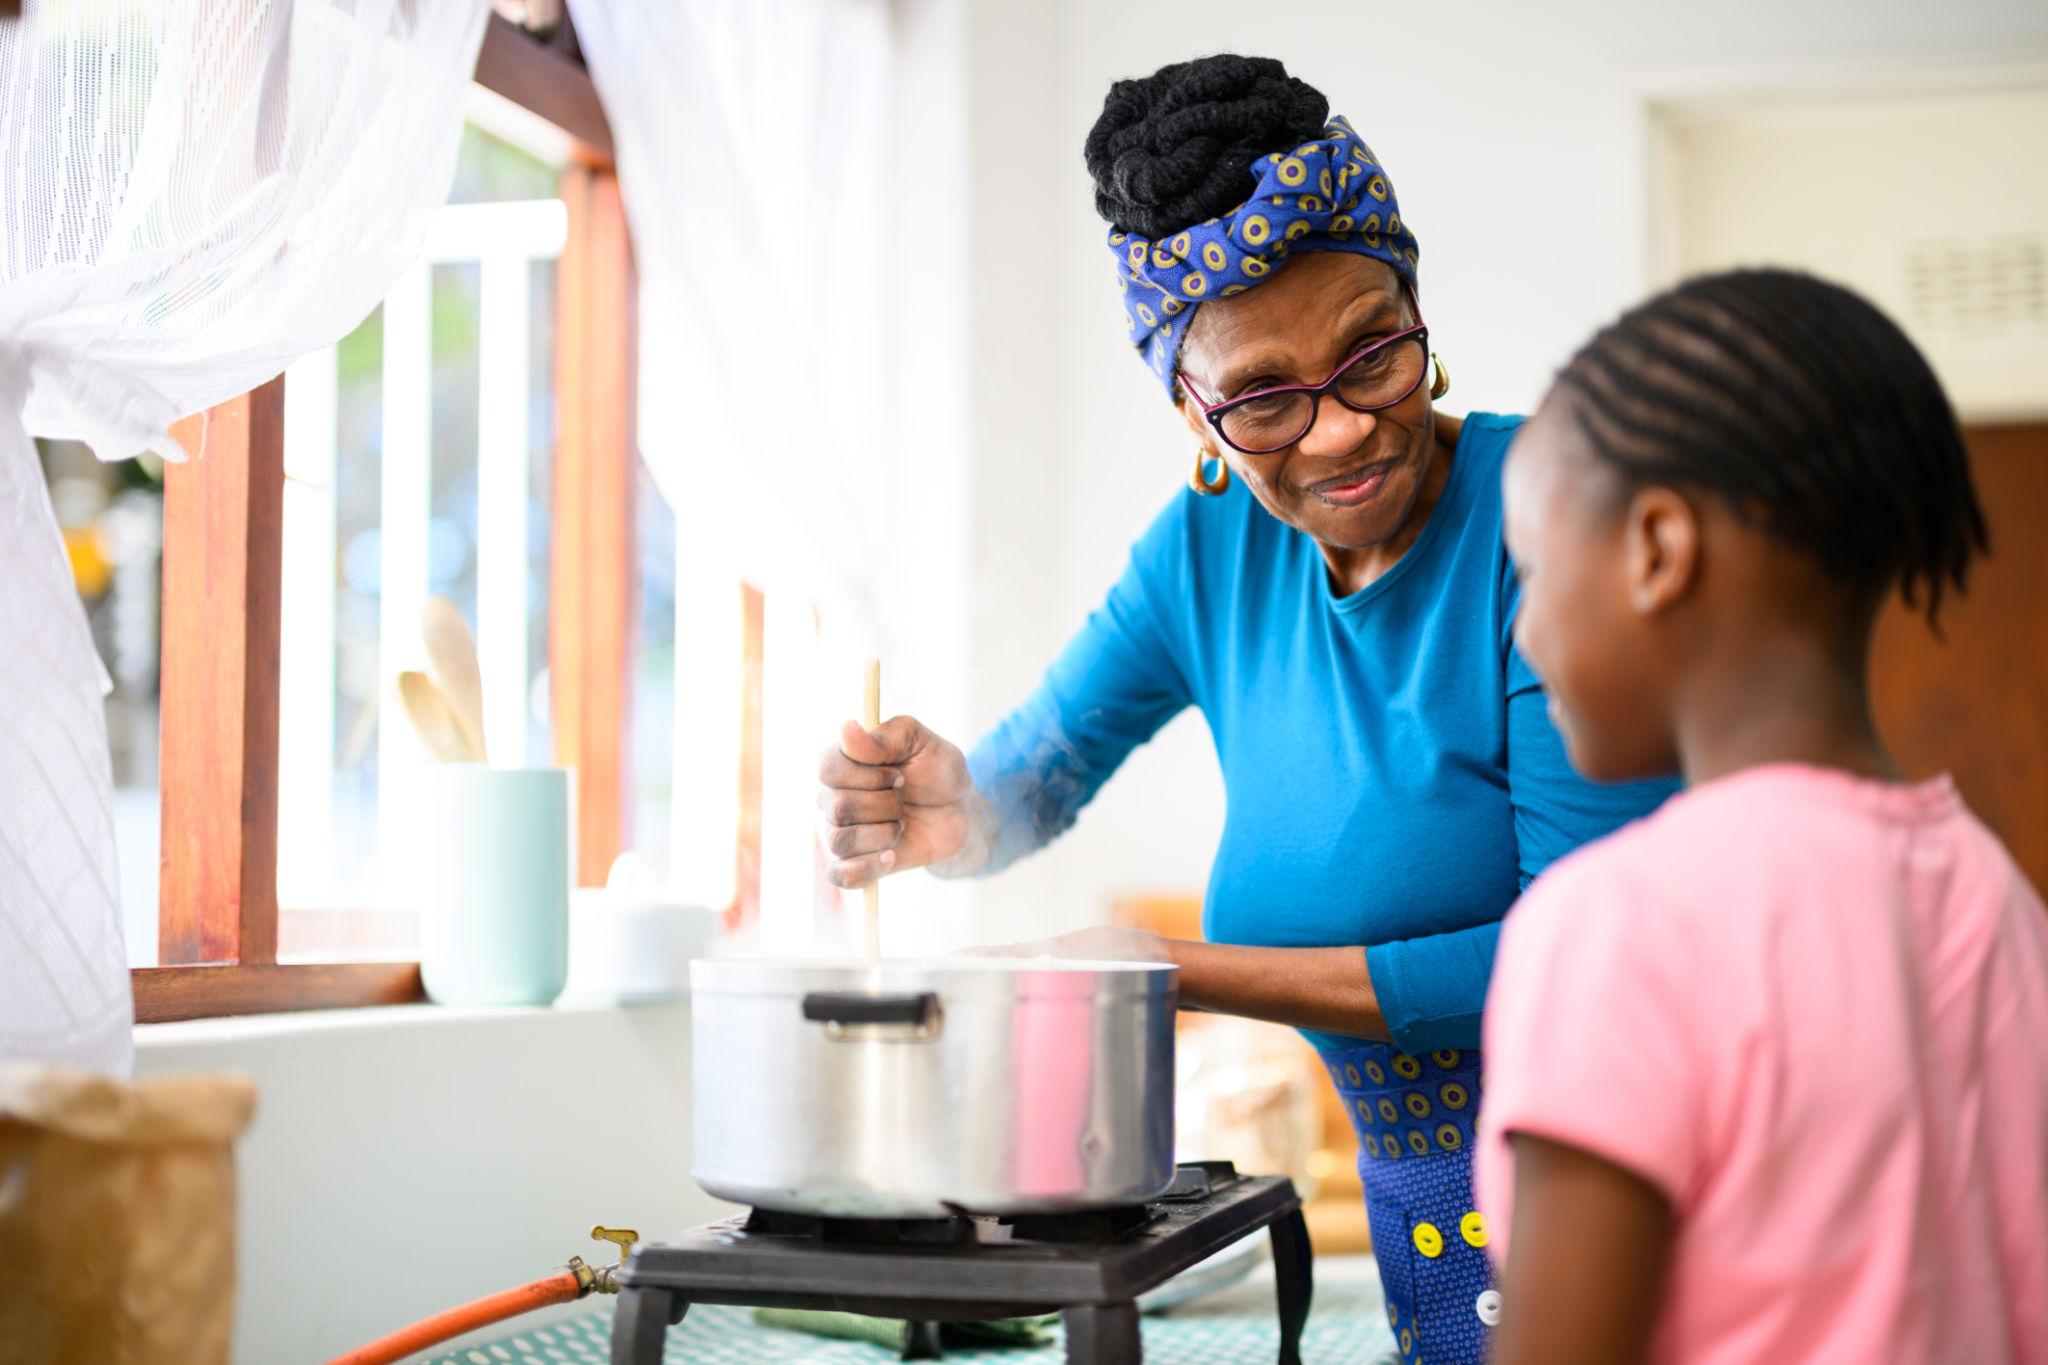
“The most unforgettable meals are not measured by what we put on the table, but by the memories we make around it.”
Few dishes are as deeply rooted in South African home cooking as a good pot of stywe pap. Made from simple white maize meal, water and salt, this traditional staple has been enjoyed across generations and remains a favourite at family gatherings, Sunday lunches and braais. Firm, satisfying and wonderfully versatile, stywe pap is the perfect companion to rich stews, spicy chakalaka, tomato-and-onion relish or sizzling boerewors straight from the fire. It is proof that some of our most treasured foods are also the simplest.
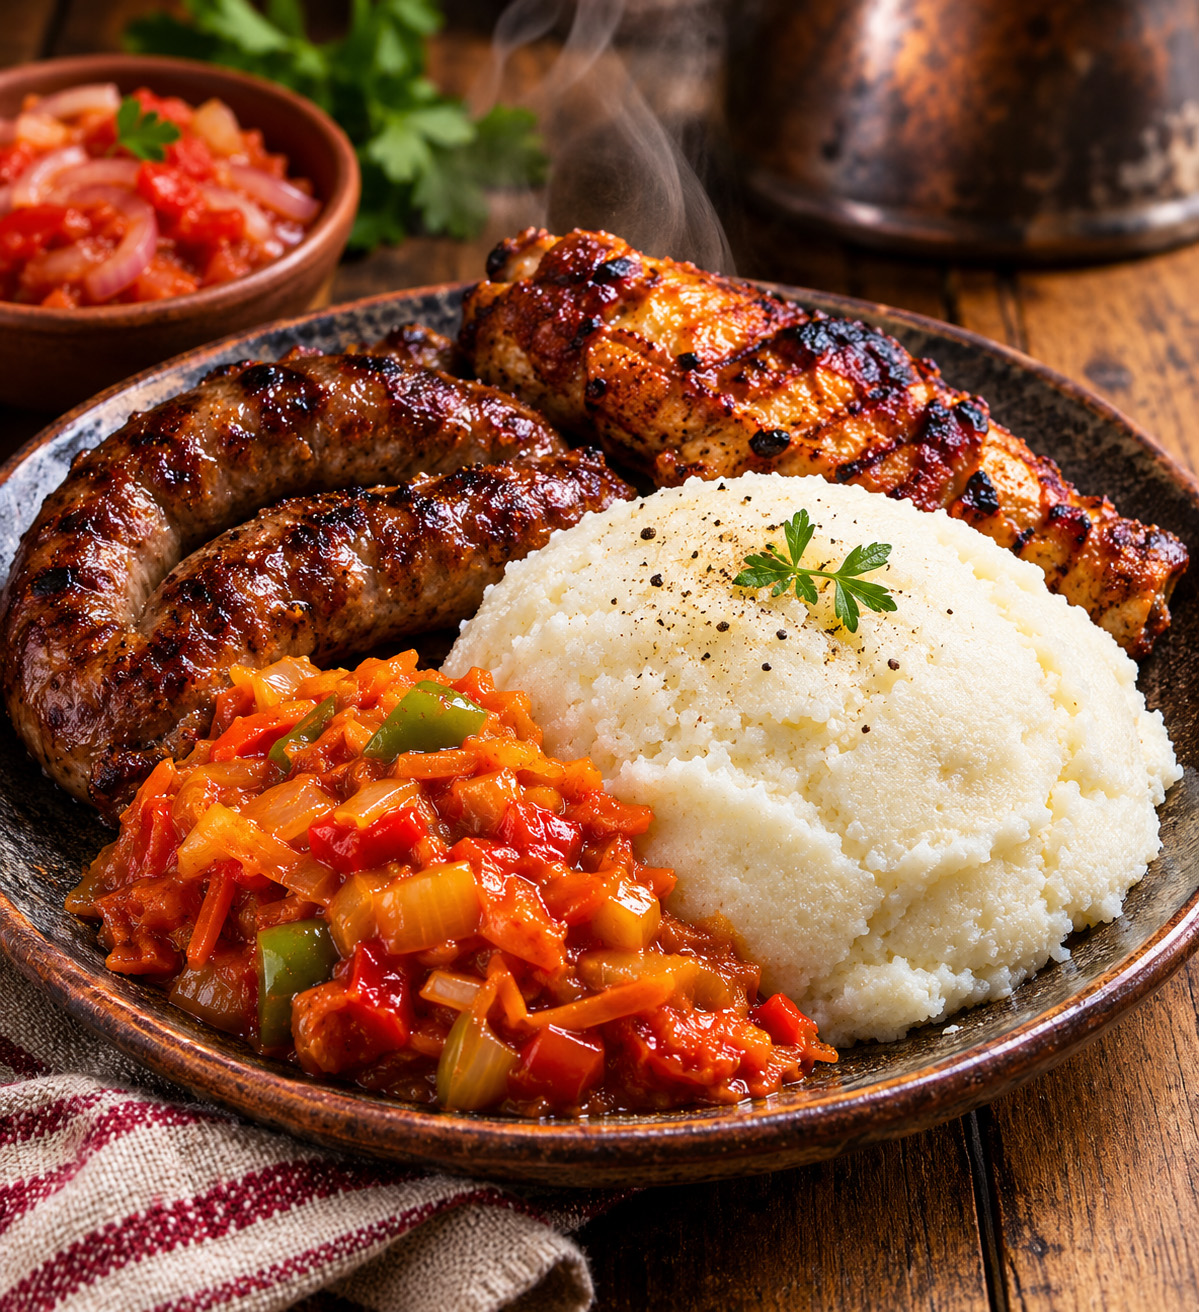
A good pot of stywe pap takes just three simple ingredients, a little patience and the right technique. The secret is gentle cooking, allowing the maize meal to steam until it becomes firm, fluffy and beautifully textured. Served alongside sizzling braai meat and spicy chakalaka, it is South African comfort food at its finest.
Pour 750 ml water into a heavy-bottomed pot. Add 1 teaspoon of salt and bring the water to a boil.
Reduce the heat to low. Gradually pour in 500 g white maize meal. Leave it undisturbed for 1–2 minutes so the maize meal begins absorbing the water.
Using a sturdy wooden spoon, stir the maize meal and water together thoroughly. Break up any large lumps until the mixture is evenly combined.
Cover the pot with a tight-fitting lid and cook over very low heat for 30–35 minutes. Stir thoroughly every 10 minutes, scraping the bottom to prevent burning. If necessary, add a small splash of boiling water.
Remove the lid and fluff the cooked pap with a fork or wooden spoon. The texture should be firm and pleasantly crumbly, with no dry, uncooked maize meal remaining.
Spoon the hot stywe pap onto serving plates. Accompany it with freshly braaied boerewors, juicy grilled chicken or beef, spicy chakalaka and tomato-and-onion sheba. Serve immediately.
For the best results, use a heavy-bottomed pot and keep the heat low once the maize meal has been added. Good stywe pap should be firm and fluffy, not watery or sticky. If the mixture becomes too dry during cooking, add a little boiling water rather than cold water. For a proper South African braai plate, serve with flame-grilled boerewors, braaied chicken or beef, and generous helpings of chakalaka. The pap is also delicious with slow-cooked beef stew or homemade tomato-and-onion sheba.
A warm bowl of soft pap has been part of South African breakfast tables for generations. Simple, comforting and wonderfully affordable, it is the kind of meal that brings back memories of early mornings and family kitchens. This version combines traditional maize-meal porridge with milk, naturally sweet banana, fresh seasonal fruit and a touch of cinnamon. It is a wholesome way to begin the day, offering energy, flavor and familiar home-cooked comfort in every spoonful.
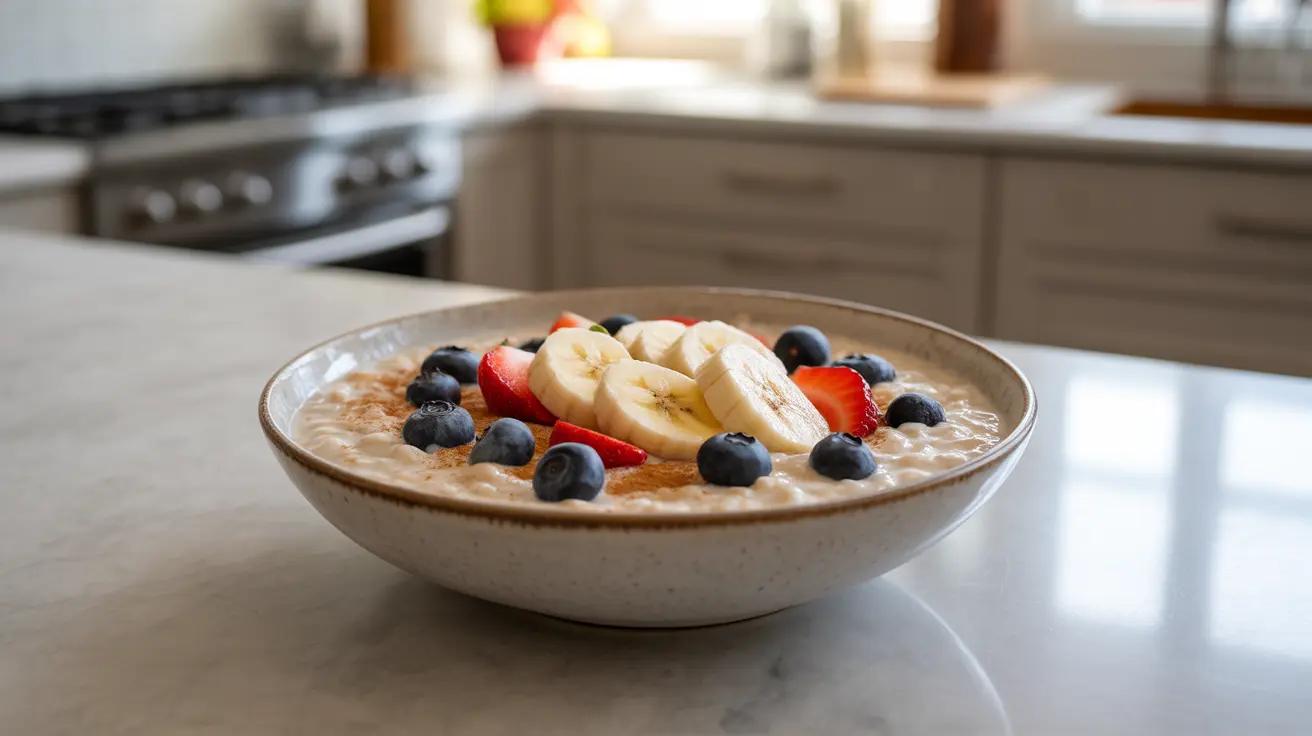
There is something wonderfully comforting about a warm bowl of soft porridge in the morning. Slowly cooked until smooth and creamy, this South African breakfast favorite is enriched with milk, naturally sweetened with ripe banana and finished with fresh fruit and cinnamon. A simple, satisfying way to start the day.
Pour 750 ml water into a medium-sized heavy-bottomed saucepan. Add a small pinch of salt and bring to a gentle boil over medium heat.
In a separate bowl, mix the 150 g white maize meal with approximately 150 ml of the measured cold milk to form a smooth paste. This helps prevent lumps when adding the maize meal to the hot water.
Reduce the heat to low. Gradually whisk the maize-meal paste into the simmering water, stirring continuously until the mixture begins to thicken.
Slowly add the remaining 350 ml milk, stirring until combined. Cover partially and simmer gently for 20–25 minutes, stirring frequently to prevent sticking. Add a little extra water or milk if the porridge becomes too thick.
Stir in ½ teaspoon ground cinnamon. Taste and adjust the consistency with a splash of warm milk if necessary. The finished porridge should be smooth, creamy and soft enough to eat with a spoon.
Divide the warm porridge between four bowls. Top with sliced banana, fresh berries or chopped apple, and optional ground flaxseed. Finish with a light dusting of cinnamon and serve immediately.
For the smoothest breakfast pap, mix the maize meal with cold milk before adding it to hot water. Stir regularly and cook over low heat to prevent lumps and scorching. If the porridge thickens too much, add a little warm milk or water until it reaches your preferred consistency. Ripe bananas provide natural sweetness, while fresh fruit and optional ground flaxseed add variety and fibre. For a dairy-free version, use unsweetened fortified soya milk. If serving young children, allow the pap to cool to a safe temperature before eating.
Few things bring a family together quite like the smell of a hearty beef stew slowly simmering on the stove. Tender chunks of beef, soft potatoes and sweet carrots come together in a rich, savoury gravy that fills the kitchen with the comforting aromas of home. This traditional South African favorite is made for sharing. Whether served with fluffy stywe pap, steamed dombolo or a generous helping of rice, every spoonful delivers the kind of warmth and flavor that makes a simple family meal unforgettable.
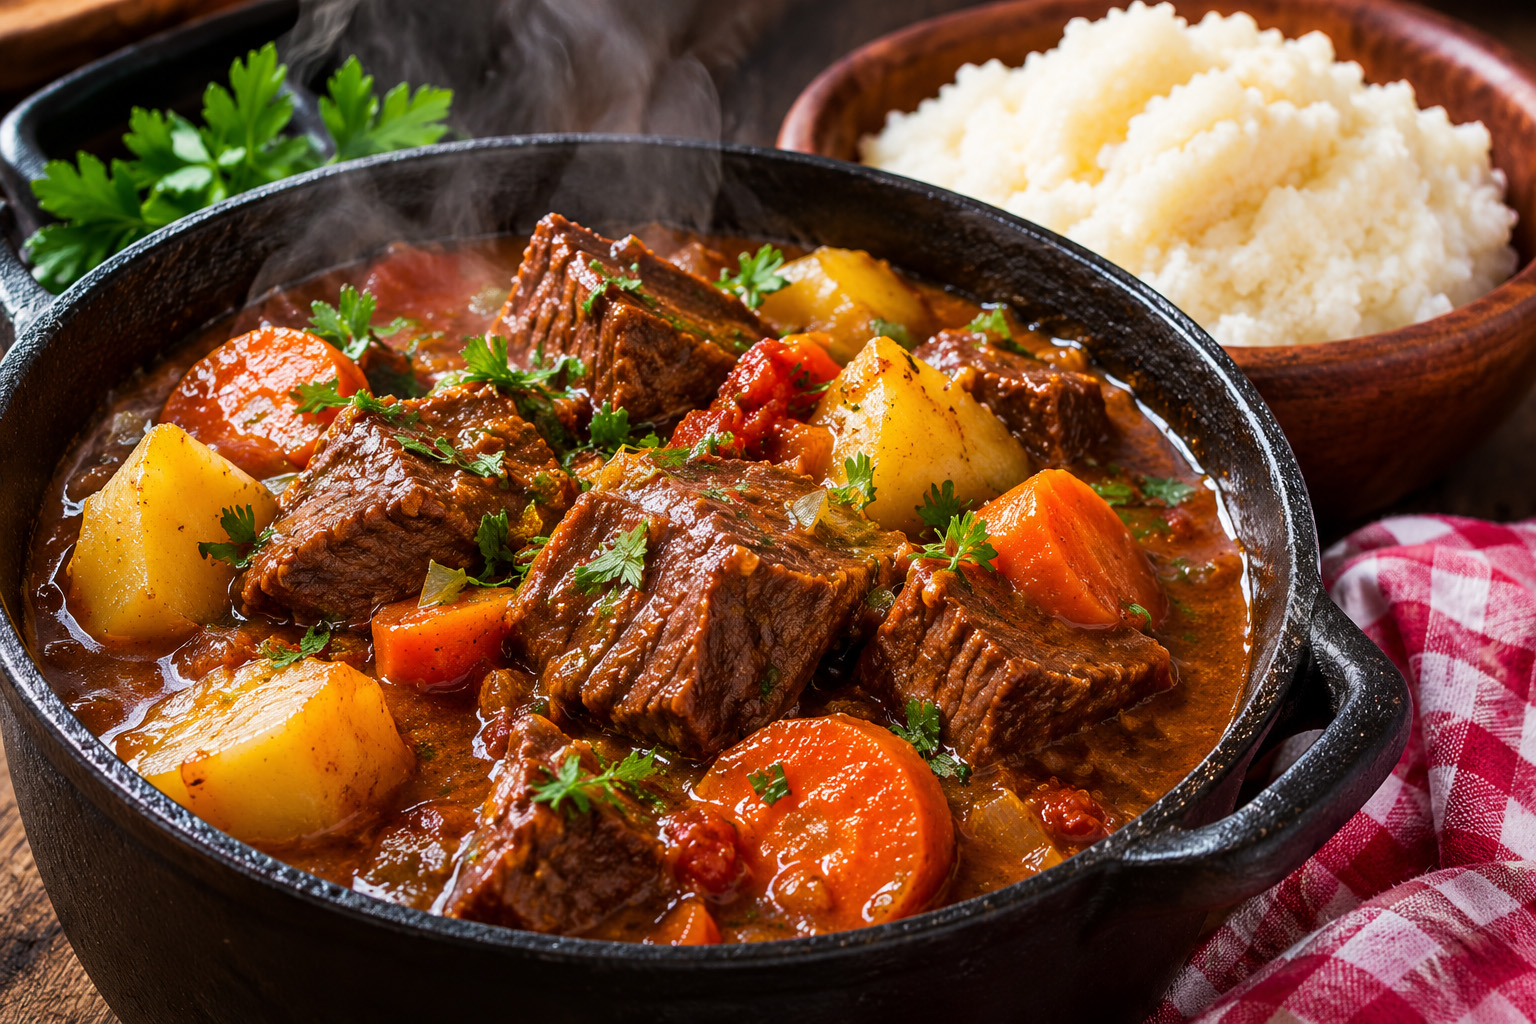
The secret to a truly delicious South African beef stew is patience. Slowly simmering the beef allows it to become beautifully tender while the onions, tomatoes and spices develop into a rich, deeply flavored gravy. As the potatoes and carrots cook in the Savory sauce, they absorb all those wonderful flavors, creating a hearty family meal that tastes even better when shared around the dinner table.
Pat the beef cubes dry with kitchen paper. Heat the sunflower oil in a large, heavy-bottomed pot over medium-high heat. Brown the beef in batches for 3–4 minutes per batch, turning until golden on several sides. Transfer the browned meat to a plate.
Reduce the heat to medium. Add the chopped onions to the same pot and cook for 5 minutes until softened. Stir in the crushed garlic and cook for another 30 seconds, taking care not to burn it.
Add the tomato paste, chopped tomatoes, paprika, dried thyme and black pepper. Stir well and cook for 3–4 minutes, scraping the bottom of the pot to release the browned bits left by the beef.
Return the beef and any collected juices to the pot. Pour in the 750 ml beef stock and add the bay leaves. Stir gently, bring to a light simmer, then reduce the heat to low. Cover with a lid and simmer for approximately 1 hour 45 minutes, stirring occasionally.
Add the quartered potatoes and sliced carrots. Stir carefully, cover again and continue cooking for another 35–45 minutes, or until the vegetables are tender and the beef can easily be pulled apart with a fork. Add a splash of water if the gravy reduces too much.
For a thicker gravy, stir together 1 tablespoon corn flour and 2 tablespoons cold water until smooth. Pour the mixture into the gently bubbling stew and cook uncovered for 3–5 minutes, stirring until the sauce thickens. Remove the bay leaves, taste and season with salt as needed.
Switch off the heat and allow the stew to rest for 5 minutes. Garnish with freshly chopped parsley, if desired. Serve hot with traditional stywe pap, fluffy rice or freshly steamed dombolo to soak up the rich gravy.
**Choose the right beef: ** Beef chuck is ideal for slow cooking because its connective tissue gradually softens, producing tender, flavorful meat. Avoid lean, quick-cooking cuts, which may become dry. **Low and slow: ** Keep the stew at a gentle simmer rather than a rolling boil. If the beef is still tough after the recommended cooking time, continue simmering until fork tender. **Perfect gravy:** The potatoes naturally help thicken the sauce. For an even richer consistency, add the optional cornflour mixture near the end of cooking. **Make it ahead:** This stew develops even deeper flavour overnight. Refrigerate promptly in covered, shallow containers and reheat thoroughly before serving. **Serving suggestion: ** Enjoy with stywe pap, dombolo or rice. A spoonful of chakalaka on the side adds a delicious South African touch.
There is something truly special about lifting the lid of a steaming pot and discovering a beautifully risen loaf of dombolo. Soft, fluffy and wonderfully comforting, this traditional South African steamed bread has been a favourite in family kitchens for generations. Made with simple ingredients and a little patience, dombolo is the perfect companion to a hearty beef stew, rich chicken gravy or a steaming pot of mogodu. Tear off a warm piece, dip it into the sauce and enjoy the unmistakable taste of home.
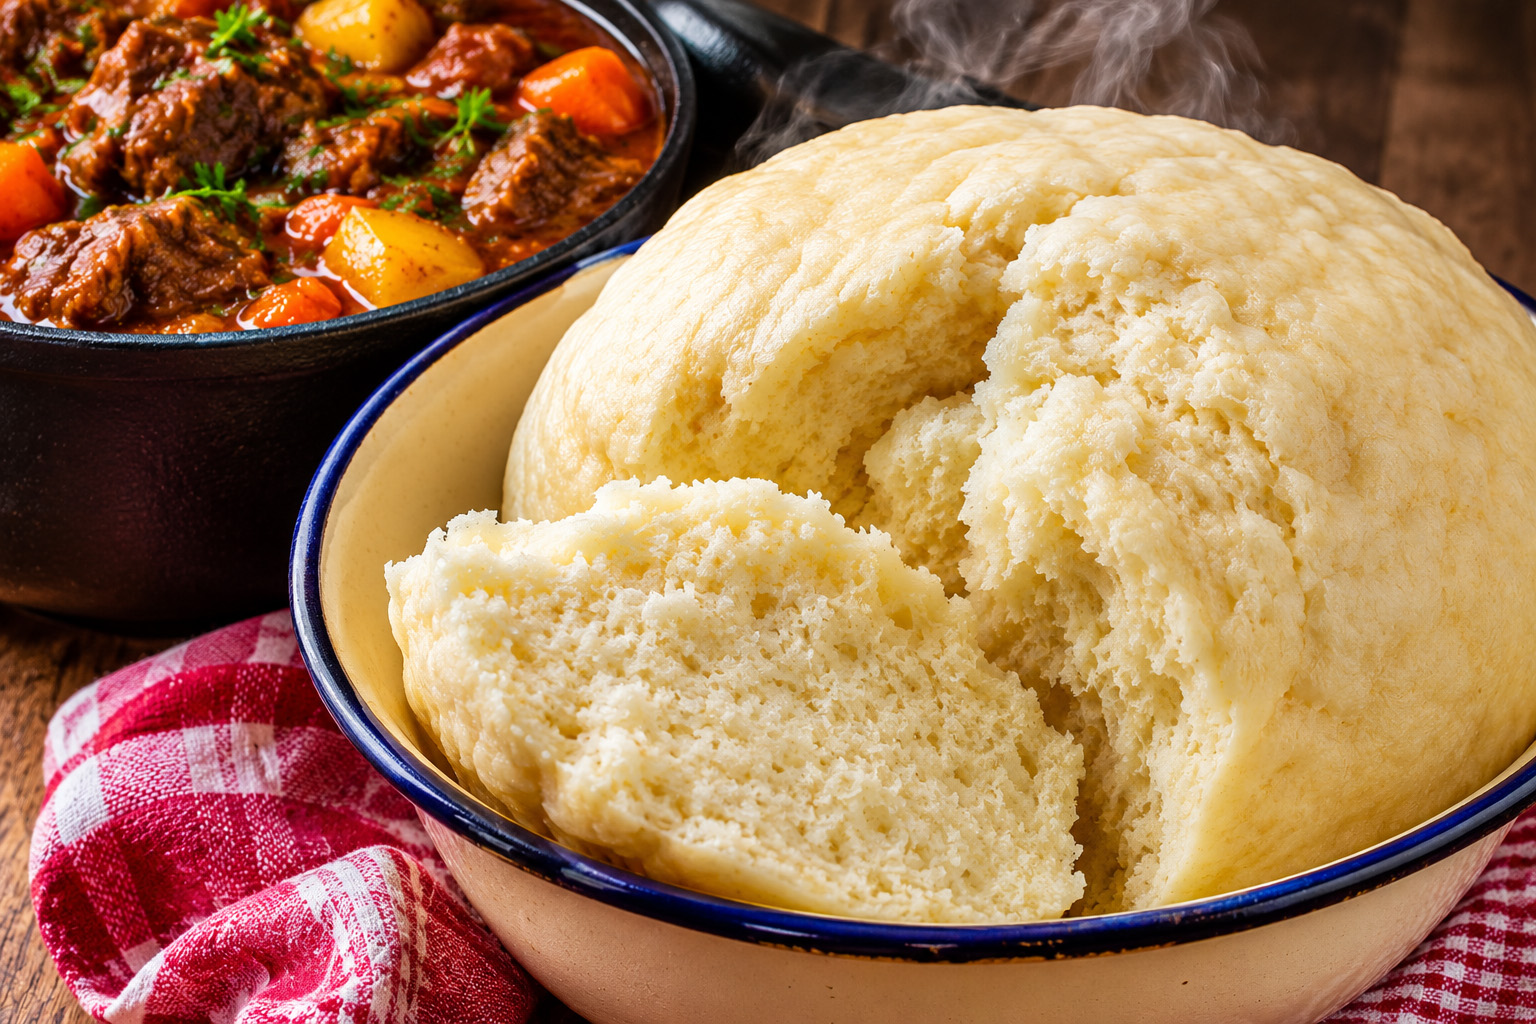
Making beautiful, fluffy dombolo is all about giving the dough enough time to rise and allowing the steam to work its magic. With just a handful of everyday ingredients, a little kneading and a gently steaming pot, you can create a wonderfully soft bread that brings the comforting flavours of a traditional South African kitchen straight to your table. The reward is a warm, tender loaf that tears apart beautifully and soaks up every last drop of delicious homemade gravy.
Sift 500 g cake flour into a large mixing bowl. Add the 10 g instant dry yeast, 2 tablespoons sugar and 1 teaspoon salt. Mix thoroughly to distribute the yeast evenly through the flour.
Create a well in the centre of the flour mixture. Pour in 2 tablespoons sunflower oil and gradually add 300 ml lukewarm water, mixing with a wooden spoon or your hands. Add up to another 25 ml water if needed to form a soft, slightly tacky dough. The water should feel comfortably warm, not hot.
Turn the dough onto a lightly floured surface and knead for 8–10 minutes until smooth, elastic and soft. Alternatively, knead in a stand mixer fitted with a dough hook for approximately 6–8 minutes. Avoid adding too much extra flour, as this can make the finished dombolo heavy.
Lightly oil a large bowl and place the dough inside, turning it once to coat the surface. Cover with a clean kitchen towel or lightly oiled cling film. Leave in a warm, draught-free place for 60–90 minutes, or until approximately doubled in size.
Lightly grease a heatproof bowl or suitable steaming mould with sunflower oil. Gently press the risen dough down to release excess air, then shape it into a smooth round loaf. Place the dough in the prepared bowl, ensuring there is enough space for it to expand. Cover loosely and allow it to rest for another 15–20 minutes while preparing the steamer.
Pour enough boiling water into a large, deep pot to maintain a steady supply of steam without touching the bread bowl. Place a stable steaming rack or trivet inside the pot, then carefully position the bowl on top. The bowl must remain above the water level. Cover the pot with a well-fitting lid.
Steam over medium-low heat for approximately 45–60 minutes, maintaining a gentle, steady flow of steam. Avoid lifting the lid unnecessarily, especially during the first 35 minutes. Check the water level when necessary and carefully top up with boiling water to prevent the pot from boiling dry. The bread is ready when the centre is fully set and a skewer inserted into the thickest part comes out without wet dough.
Carefully remove the steaming bowl using oven gloves and allow the dombolo to rest for 5–10 minutes. Loosen the edges with a knife and turn the bread out onto a serving plate. Slice or tear into generous pieces and serve warm with beef stew, chicken stew or mogodu, allowing the fluffy bread to soak up the rich gravy.
**The secret to fluffy dombolo:** Always use fresh yeast and give the dough enough time to rise. The dough should be soft and slightly tacky, not stiff or dry. **Water temperature matters: ** Lukewarm water helps the yeast work effectively. Water that is too hot can damage the yeast and prevent the dough from rising properly. **Steaming is essential: ** Keep the bread bowl raised above the boiling water so the dough cooks in steam rather than sitting in water. Use a stable heatproof bowl and rack and never allow the pot to boil dry. **Avoid opening the lid: ** Opening the pot repeatedly releases steam and may affect the bread's rise and texture. Check only when necessary. **Serving suggestion: ** Dombolo is especially delicious with slow-cooked beef stew, traditional chicken stew, mogodu or a generous helping of rich homemade gravy. **Storing leftovers: ** Allow the bread to cool completely, then refrigerate in an airtight container for up to 2 days or freeze in portions. Reheat thoroughly by steaming until hot and soft.
There is something special about a South African Sunday afternoon when the smell of roast chicken fills the house. The potatoes are turning golden in the oven, the gravy is almost ready, and everyone knows that a delicious family meal is on its way. This Golden Sunday Roast Chicken is everything a traditional Sunday lunch should be. Beautifully seasoned with garlic, lemon and fragrant herbs, the chicken roasts until its skin is golden and crisp while the meat stays tender and juicy. Surrounded by perfectly roasted potatoes, sweet carrots and onions, it is a meal made for sharing, creating memories and bringing the family together around the table.
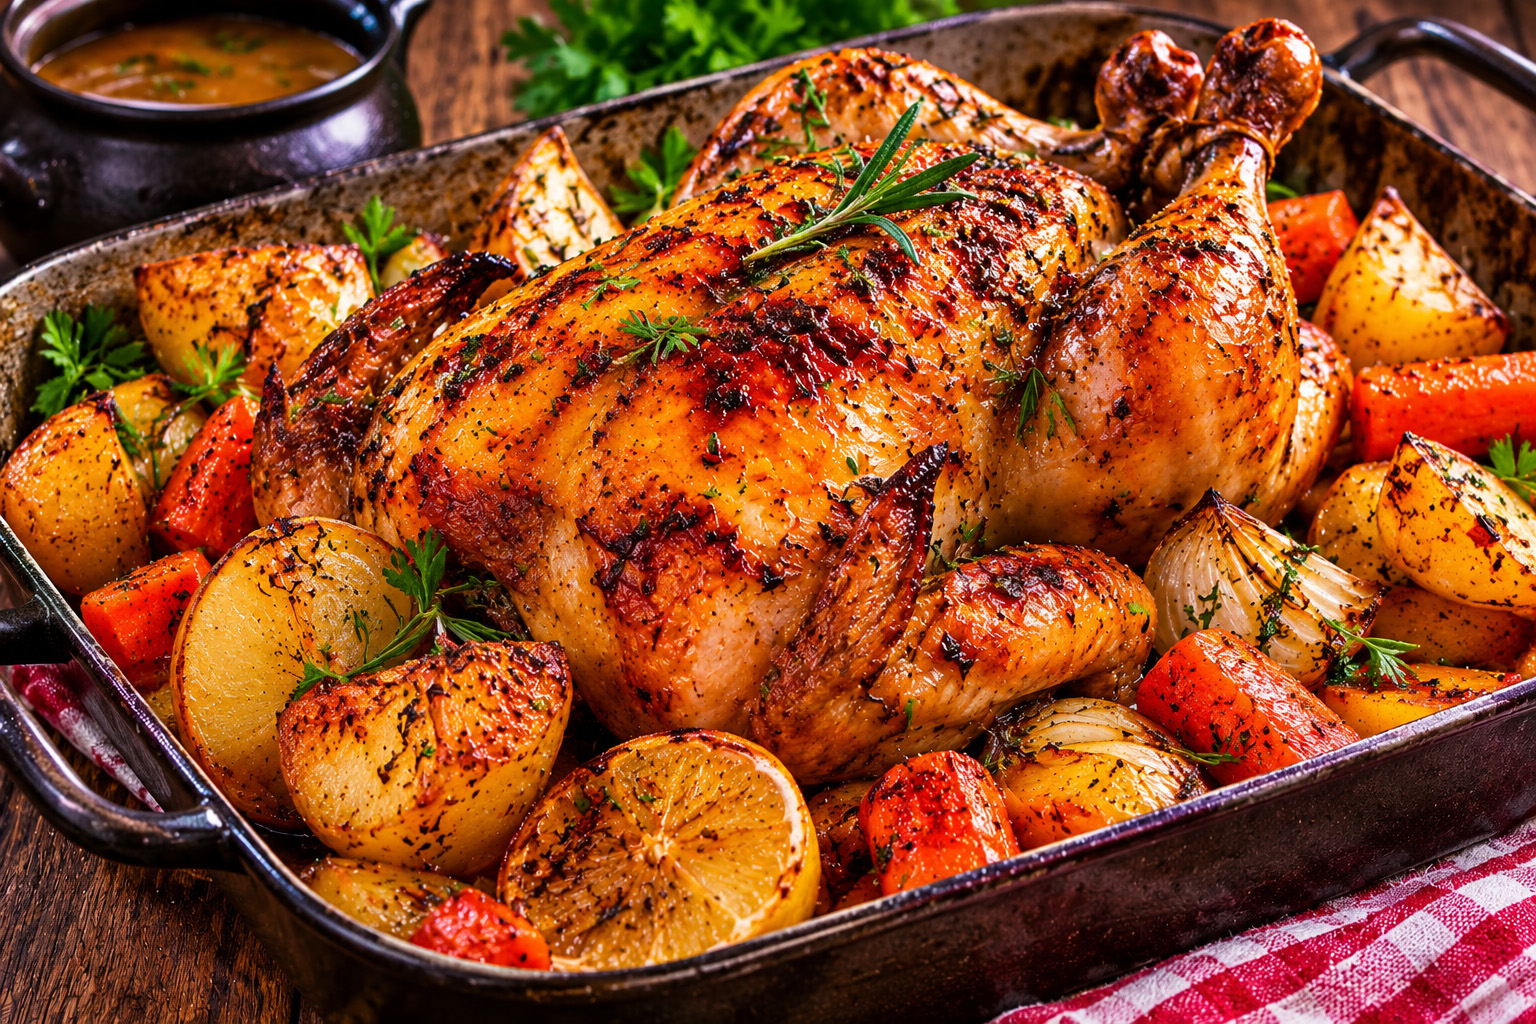
The secret to a memorable Sunday roast is beautifully seasoned chicken, a hot oven and enough patience to let everything cook to perfection. As the chicken roasts, its juices mingle with garlic, lemon and fragrant herbs, creating a delicious foundation for the potatoes, vegetables and gravy. With golden, crispy skin on the outside and tender, juicy meat inside, this traditional family favorite is made for generous servings, good conversation and those wonderful Sunday afternoons spent together around the table.
Preheat the oven to 200°C (180°C fan-assisted). Position an oven rack in the lower-middle section. Remove any giblets from the chicken cavity, if present, and pat the chicken dry with kitchen paper. Do not wash raw chicken, as this can spread bacteria around the kitchen.
In a small bowl, combine the 50 g softened butter, 2 tablespoons olive oil, crushed garlic, paprika, dried thyme, dried rosemary, 1 teaspoon salt and ½ teaspoon black pepper. Mix until smooth. Gently loosen the skin over the chicken breasts and spread some of the seasoned butter underneath. Rub the remaining mixture over the outside of the chicken.
Squeeze one lemon half lightly over the chicken, then place both lemon halves inside the cavity with the optional fresh rosemary sprigs. Set the chicken breast-side up in a large roasting tray. Tuck the wing tips underneath the bird to prevent them from burning.
Place the quartered potatoes, carrot pieces and onion wedges in a large bowl. Toss with the remaining 2 tablespoons olive oil, ½ teaspoon salt and ¼ teaspoon black pepper. Arrange the vegetables around the chicken in a single layer, leaving some space between the pieces for even roasting.
Place the tray in the preheated oven and roast for approximately 45 minutes. Carefully turn the potatoes and carrots to encourage even browning. If the chicken skin begins to darken too quickly, cover the bird loosely with foil while leaving the vegetables exposed.
Continue roasting for approximately 45–65 minutes, checking the chicken's temperature towards the end. The thickest part of the breast and the innermost part of the thigh must reach at least 74°C, measured with a food thermometer without touching bone. Cooking time will vary with the size of the chicken and oven performance. The vegetables should be tender and golden.
Carefully transfer the cooked chicken to a clean carving board, cover loosely with foil and rest for 15 minutes. Transfer the roasted vegetables to a warm serving dish. Place the roasting tray over low heat on the stovetop only if it is stovetop-safe; otherwise transfer the pan juices to a saucepan. Add 250 ml chicken stock, scrape up the browned bits and simmer for 5–8 minutes to create a flavourful light gravy. Taste and adjust the seasoning.
Remove the lemon halves and herbs from the cavity and discard them. Carve the rested chicken into generous portions and arrange on a serving platter with the golden potatoes, carrots and onions. Spoon over a little warm gravy, garnish with chopped fresh parsley if desired, and serve the remaining gravy separately.
**Beautifully golden skin: ** Pat the chicken dry before seasoning. Dry skin and a properly preheated oven help create a delicious golden finish. **Keep the chicken juicy: ** Spreading seasoned butter underneath the breast skin helps protect the meat during roasting. Avoid overcooking and always allow the chicken to rest before carving. **Check the temperature: ** The safest way to confirm doneness is with a food thermometer. Both the thickest part of the breast and the innermost thigh should reach at least 74°C without the probe touching bone. **Perfect roast potatoes: ** Cut the potatoes into similar-sized pieces and spread them out around the chicken. Turn them halfway through cooking for even browning. **Make the gravy richer: ** Simmer the roasting juices with chicken stock, scraping up the flavorful browned bits. For a thicker gravy, reduce it a little longer or add a small amount of corn flour mixed with cold water. **Traditional Sunday lunch: ** Serve with yellow rice, creamy spinach, pumpkin fritters, beetroot salad or homemade brown onion gravy for a generous South African family feast. **Leftovers: ** Refrigerate cooked chicken within 2 hours in covered, shallow containers. Use within 3–4 days or freeze for longer storage. Reheat leftovers thoroughly.
A good South African beef curry is about more than just heat. It is about the wonderful aroma of onions, garlic, ginger and curry leaves filling the kitchen, the deep flavour of carefully blended masalas and the patience of allowing every ingredient to come together. This traditional spicy beef curry brings together tender pieces of beef, potatoes, fresh chilies and a generous helping of fragrant Danya. The combination of Kashmiri, Mother-in-Law, Bombay Delights, jeeru and garam masalas creates a rich, beautifully spiced gravy that is perfect for soaking up with soft roti, fluffy rice or freshly steamed bread. It is bold, comforting and full of the unmistakable flavor of a South African home kitchen.
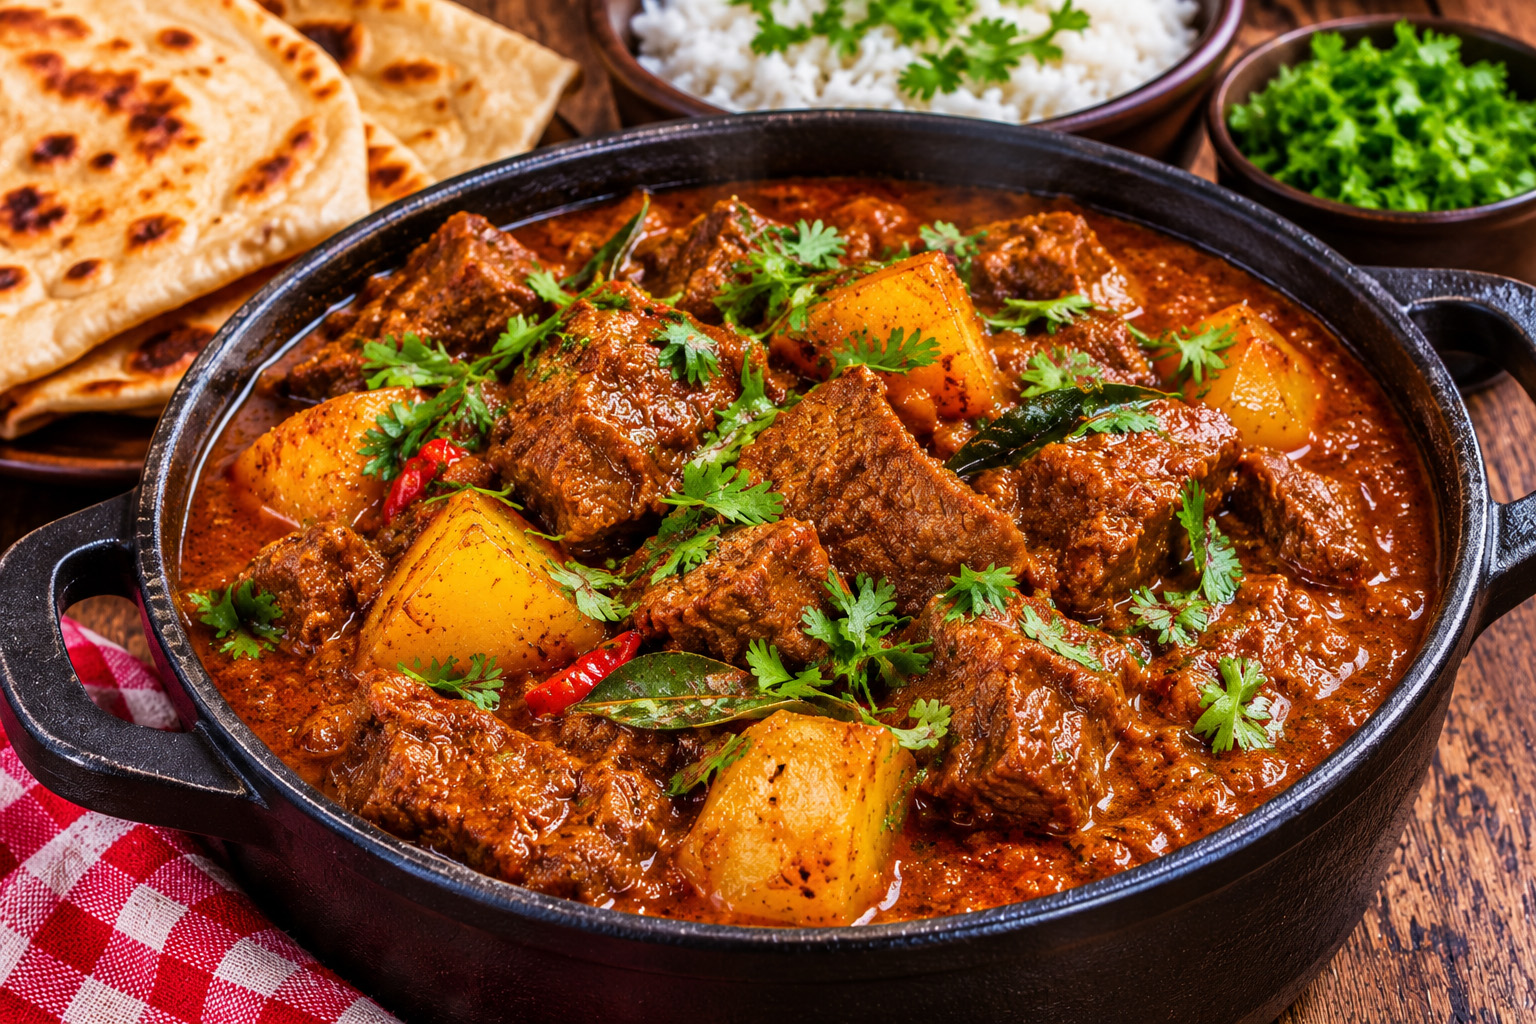
A truly flavourful beef curry begins long before the potatoes go into the pot. The beef is first cooked until beautifully tender with garlic, ginger and cinnamon, allowing those warm, aromatic flavours to develop deep within the meat. The magic happens when the onions, fresh chilies and curry leaves are gently braised, followed by a distinctive blend of South African masalas. As the curry simmers, the spices develop into a rich, fragrant gravy, while the potatoes absorb every bit of flavor. Finished with a generous handful of fresh Danya, this is the kind of homemade curry that brings everyone back for seconds.
Place 1.5 kg cubed stewing beef in a large pot with 2 cinnamon sticks, 1 tablespoon crushed garlic and 1 tablespoon crushed ginger. Add enough water to cover the meat. Bring to a boil, reduce the heat and simmer gently for approximately 1½–2 hours, or until the beef is tender. Alternatively, use a pressure cooker according to the manufacturer's instructions, allowing the pressure to release safely before opening. Reserve the cooking liquid for the curry.
In a small bowl, combine 1 tablespoon each of Kashmiri masala, Mother-in-Law masala, Bombay Delights masala, garam masala and jeeru masala. Add 1 tablespoon Gorima's All-Purpose Masala if available, together with ½ teaspoon ground turmeric. Mix well and set aside. The turmeric quantity is a suggested starting point.
Heat 3 tablespoons sunflower oil in a large, heavy-bottomed pot over medium heat. Add the 2 chopped onions, 3 chopped green chilies and 10–12 fresh curry leaves. Braise for approximately 8–10 minutes, stirring regularly, until the onions are golden brown and fragrant.
Stir in the remaining 1 tablespoon crushed garlic and 1 tablespoon crushed ginger. Cook for approximately 1 minute. Remove the pot from the heat, add the prepared dry masala mixture and stir thoroughly into the onions. If the mixture is too dry, add a splash of reserved beef cooking liquid to prevent the spices from scorching.
Return the pot to low heat. Add the pre-cooked beef and stir gently for approximately 2 minutes, allowing the meat to become coated in the fragrant masala mixture. Add enough reserved beef cooking liquid or water to just cover the meat. Season lightly with salt, remembering that some prepared masalas may already contain salt.
Bring the curry to a gentle simmer and cook for approximately 20 minutes, stirring occasionally. Add small amounts of reserved beef cooking liquid or water whenever the gravy begins to reduce too much. The aim is to develop a rich, thick sauce without allowing the spices to catch on the bottom of the pot.
Stir in the 2 grated tomatoes and 2 teaspoons sugar. Continue simmering gently for approximately 10–15 minutes, allowing the tomatoes to soften and blend into the masala gravy. Taste the sauce and adjust the salt if necessary. Add a little more water if the mixture becomes too thick.
Add the 4 peeled and quartered potatoes. Pour in enough reserved beef cooking liquid or water to just cover the potatoes, then stir carefully. Cover and simmer for approximately 20–30 minutes, or until the potatoes are completely tender. Stir gently from time to time and add more liquid as needed to prevent the curry from drying out.
Once the potatoes are soft and the curry has developed a rich gravy, stir in a generous bunch of freshly chopped Danya (coriander). Don't be shy with the Danya — it gives the curry its wonderful fresh finish. Allow the curry to simmer for another 1–2 minutes, then switch off the heat. Serve hot with soft roti, fluffy basmati rice or freshly steamed bread.
**Tender beef makes all the difference: ** pre-cooking the beef with garlic, ginger and cinnamon allows the meat to become beautifully tender before it is added to the masala gravy. Beef chuck or stewing beef works particularly well. **A distinctive blend of masalas: ** Kashmiri, Mother-in-Law, Bombay Delights, garam and jeeru masalas each contribute their own flavor. Gorima's All-Purpose Masala can be included when available. Because these spice blends vary in strength and salt content, adjust the final seasoning to taste. **Protect the spices: ** Always remove the pot from the heat before adding the dry masala mixture. Stir well and add a splash of liquid if necessary to prevent burning. **Keep the gravy rich: ** As the curry cooks, add small amounts of water or reserved beef cooking liquid whenever the sauce reduces too much. Avoid adding excessive water at once, as this can dilute the flavor. **Perfect potatoes: ** Add the potatoes only after the beef has been coated in the spices and the tomato gravy has developed. Cook until the potatoes are tender but still hold their shape. **Don't be shy with the Danya:** Fresh coriander is an essential finishing ingredient in this recipe. Add a generous handful near the end of cooking for a fresh, fragrant finish. **Serving suggestion: ** Enjoy with homemade roti, basmati rice or soft steamed bread. A fresh tomato-and-onion sambal makes a delicious accompaniment.
There is nothing quite like the aroma of a Durban mutton curry slowly cooking on the stove. The fragrance of fresh curry leaves, ginger, garlic and carefully blended spices fills the kitchen long before the first plate is served. It is a dish with character, warmth and a wonderful depth of flavour. This Durban favorite brings together tender pieces of mutton, soft potatoes and a rich, beautifully spiced gravy. Prepared with a little less oil, fresh ingredients and plenty of aromatic seasoning, it delivers all the comforting flavor of a traditional home-cooked curry. Serve it with fluffy rice, warm roti or a fresh tomato-and-onion sambal for a meal that is every bit as satisfying as it is memorable.
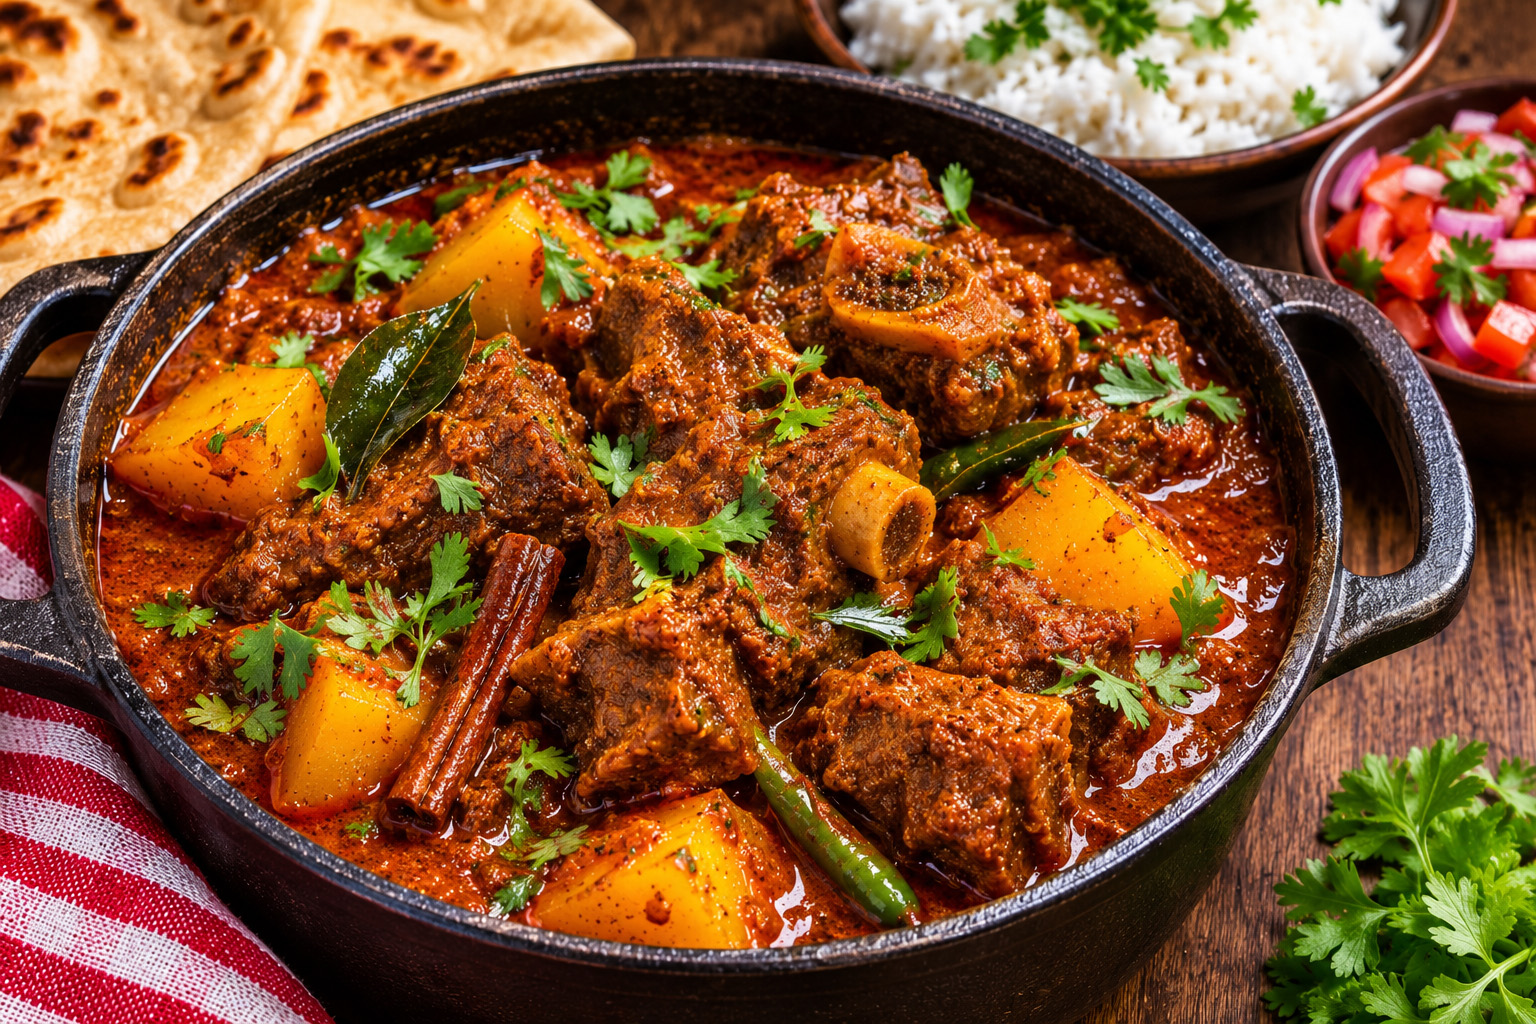
The secret to a memorable Durban mutton curry lies in the way the spices are brought to life. Slowly browned onions, fresh curry leaves, ginger and garlic form the foundation, while carefully blended masalas create the deep, warming flavour that makes this dish so special. As the mutton simmers, it becomes beautifully tender and releases its natural richness into the gravy. Golden potatoes absorb the fragrant sauce, and a generous scattering of fresh Danya adds the perfect finishing touch. With patience, good ingredients and a little love, this curry delivers the unforgettable taste of a traditional Durban kitchen.
Trim away excess visible fat from 1.2 kg bone-in mutton, leaving some for flavor. Pat the pieces dry with kitchen paper. Prepare the chopped onions, crushed garlic, grated ginger, green chilies, grated tomatoes and potatoes before starting the curry.
In a small bowl, combine 2 tablespoons Durban-style curry masala, 1 teaspoon turmeric, 1 teaspoon ground cumin, 1 teaspoon ground coriander, 1 teaspoon garam masala and ½ teaspoon black pepper. Mix thoroughly. Keep the cinnamon stick, 3 lightly crushed cardamom pods and 2 whole cloves ready separately.
Heat 2 tablespoons sunflower oil in a large, heavy-bottomed pot over medium heat. Add the 2 sliced onions and cook for approximately 8–10 minutes, stirring frequently, until golden brown. Add the cinnamon stick, cardamom pods, cloves, 12–15 curry leaves and 3 green chilies. Cook for another minute until fragrant.
Add the 4 crushed garlic cloves and 2 tablespoons grated ginger. Stir for approximately 1 minute. Reduce the heat to low and add the prepared ground spice mixture. Stir continuously for 30–60 seconds, adding a small splash of water if necessary to prevent the spices from burning.
Add the mutton pieces to the pot and stir thoroughly until coated in the fragrant spice mixture. Increase the heat slightly and cook for approximately 8–10 minutes, turning the pieces regularly. The meat should begin to brown lightly while absorbing the flavor of the masala.
Stir in the 2 grated tomatoes and 2 tablespoons tomato paste. Cook for approximately 5 minutes until the tomatoes soften and the mixture becomes rich and fragrant. Pour in the measured 500 ml water, bring to a gentle simmer and cover. Cook over low heat for approximately 60–90 minutes, stirring occasionally, until the mutton is nearly tender. Add small amounts of extra hot water if the gravy reduces too much.
Once the mutton is almost tender, add the 4 peeled and quartered potatoes. Stir gently to coat them in the masala gravy. Add a little hot water if needed, cover and simmer for another 25–35 minutes, or until the potatoes are soft and the mutton is completely tender. The gravy should be rich enough to coat the meat and potatoes without becoming watery.
Taste the gravy and season with salt as needed. If the sauce is too thin, simmer uncovered for a few minutes to reduce it. Stir in a generous handful of chopped fresh Danya and, if desired, a small squeeze of fresh lemon juice. Allow the curry to simmer gently for another 1–2 minutes before switching off the heat.
Allow the curry to stand for approximately 5 minutes before serving. Remove the cinnamon stick, cardamom pods and cloves where possible. Spoon the tender mutton, potatoes and rich masala gravy into warm serving bowls. Serve with basmati rice, homemade roti or a fresh tomato-and-onion sambal.
**Choose the right mutton: ** Bone-in mutton adds wonderful depth to the curry. Trim excess visible fat while keeping the bones, which contribute flavor as the meat slowly cooks. **Bring the spices to life: ** Allow the onions to turn golden before adding the curry leaves, whole spices, ginger and garlic. Cook the ground masalas gently over low heat, adding a splash of water if needed to prevent scorching. **Low and slow: ** Mutton becomes tender through gentle simmering. Avoid boiling the curry aggressively, as this can toughen the meat and cause the gravy to reduce too quickly. Older mutton may require additional cooking time. **Rich gravy without excessive oil:** The onions, tomatoes and tomato paste create a naturally rich sauce. Using a moderate amount of oil allows the aromatic spices and meat to provide the flavour. **Perfect potatoes: ** Add the potatoes only when the mutton is nearly tender. This prevents them from breaking apart before the meat has finished cooking. **Fresh Danya makes the difference: ** Stir in chopped coriander near the end of cooking to preserve its fresh, fragrant character. **Adjust the heat: ** Durban curry is traditionally bold and spicy, but the number of green chilies can be adjusted to suit your family's preference. The strength of commercial curry masalas also varies. **Serving suggestion: ** Enjoy with a moderate portion of basmati rice, wholewheat roti or a fresh tomato-and-onion sambal for a satisfying, balanced meal.
In many Cape Town homes, Sunday mornings have a special aroma. The comforting fragrance of cinnamon, ginger and aniseed fills the kitchen as freshly made koesisters are prepared for the family. Soft, beautifully spiced and coated in coconut, these little treats are more than something sweet to enjoy with tea. They are part of a tradition passed down through generations. Cape Malay koeksisters have a character all their own. Unlike the crisp, twisted koeksisters found elsewhere in South Africa, these are pillowy, gently spiced doughnuts that are briefly simmered in fragrant syrup before being rolled in coconut. Every bite is soft, aromatic and wonderfully comforting — a delicious reminder of family, heritage and the simple pleasure of sharing something homemade.

The secret to a beautiful Cape Malay koesister is in its soft, gently spiced dough and the fragrant syrup that gives it its unmistakable character. Cinnamon, ginger, cardamom and aniseed create a wonderful aroma, while a little patience during rising allows the dough to become light and fluffy. Once golden and cooked through, the koeksisters are briefly simmered in warm syrup and rolled in fine coconut. The result is a tender, aromatic treat that carries the warmth of Cape Malay tradition in every bite — especially when enjoyed with a freshly brewed cup of tea.
Sift 500 g cake flour into a large mixing bowl. Add 10 g instant dry yeast, 50 g white sugar, 1 teaspoon ground cinnamon, 1 teaspoon ground ginger, ½ teaspoon ground cardamom, 1 teaspoon ground aniseed and ½ teaspoon salt. Mix thoroughly to distribute the spices and yeast evenly.
In a separate bowl, lightly beat the large egg with 50 g melted and cooled butter and 250 ml lukewarm milk. Pour the wet ingredients into the flour mixture and stir until a soft dough forms. Gradually add up to another 50 ml lukewarm milk if needed. The dough should be soft and slightly sticky, but manageable.
Knead the dough on a lightly floured surface for approximately 8–10 minutes until smooth and elastic. Place in a lightly greased bowl, cover with a clean kitchen towel and leave in a warm, draught-free place for 60–90 minutes, or until approximately doubled in size.
Gently press down the risen dough to release excess air. Divide into 20–24 equal portions. With lightly oiled hands, shape each portion into a small oval, approximately 7–8 cm long. Arrange on a lightly greased tray, leaving space between them. Cover loosely and allow to rest for another 15 minutes while preparing the frying oil.
Heat sunflower oil in a deep, heavy-bottomed pot to approximately 170–175°C. Carefully lower a few koeksisters into the oil without overcrowding the pot. Fry for approximately 3–5 minutes in total, turning gently until evenly golden brown and cooked through. Adjust the heat to maintain the oil temperature. Remove with a slotted spoon and drain on kitchen paper. Repeat with the remaining dough.
Place 250 g white sugar, 375 ml water, 1 cinnamon stick, 3 lightly crushed green cardamom pods, 2 thin slices fresh ginger and 1 tablespoon lemon juice in a saucepan. Bring to a gentle boil, stirring until the sugar dissolves. Reduce the heat and simmer for approximately 8–10 minutes until lightly syrupy. Remove the whole spices and ginger slices before coating the koeksisters.
Reduce the syrup to a very gentle simmer. Working in small batches, carefully add the cooled or slightly warm koeksisters to the syrup. Turn them gently and simmer for approximately 30–60 seconds per side, just long enough to absorb some syrup without becoming soggy or breaking apart. Lift out with a slotted spoon and allow excess syrup to drain.
Spread 150 g fine desiccated coconut over a shallow plate or wide bowl. While the syrup-coated koeksisters are still slightly sticky, roll each one gently in the coconut until evenly covered. Add extra coconut if needed. Arrange on a serving platter and allow to stand for a few minutes so the coating settles.
Serve the koeksisters fresh, slightly warm or at room temperature, with a cup of rooibos tea if desired. The finished koeksisters should be soft and fluffy inside, fragrant with warm spices, lightly sweetened by the syrup and generously coated in coconut.
**The secret to soft koeksisters: ** The dough should be soft and slightly sticky rather than stiff. Add the milk gradually and avoid adding too much extra flour while kneading. **Give the dough time to rise: ** Allow the dough to approximately double in size before shaping. A second short rest after shaping helps create a lighter texture. **Traditional Cape Malay spices: ** Cinnamon, ginger, cardamom and aniseed give these koeksisters their distinctive flavor. Freshly ground spices provide a particularly wonderful aroma. **Watch the oil temperature: ** Maintain the frying oil at approximately 170–175°C. Oil that is too hot can brown the outside before the Centre cooks, while oil that is too cool can result in greasy koeksisters. **A lighter syrup finish: ** Briefly simmering the koeksisters in syrup gives them their characteristic moist texture without leaving them excessively soaked. Adjust the soaking time according to their size and softness. **Generous coconut coating: ** Roll the koeksisters in fine desiccated coconut while they are still slightly sticky, so the coconut adheres evenly. **Serving suggestion: ** Cape Malay koeksisters are traditionally enjoyed with tea, especially on Sunday mornings. Serve them fresh for the best flavor and texture. **Storage: ** Un-syruped koeksisters can be frozen once cooled, then thawed and gently warmed before syruping and coating. Refrigerate any finished leftovers promptly in an airtight container and enjoy within 2 days.
There is something unmistakably South African about the sound of a crunchy buttermilk rusk being dipped into a hot cup of coffee on a quiet morning. For generations, homemade rusks have been part of family kitchens, early mornings, long road trips and those peaceful moments before the day begins. These traditional buttermilk rusks are golden, lightly sweet and wonderfully crisp, with the familiar richness of butter and the gentle tang of buttermilk. A little wholewheat flour adds a wholesome touch, while slow drying in the oven creates that satisfying crunch we all know and love. Whether enjoyed with coffee, rooibos tea or simply on their own, every bite brings a little taste of home.
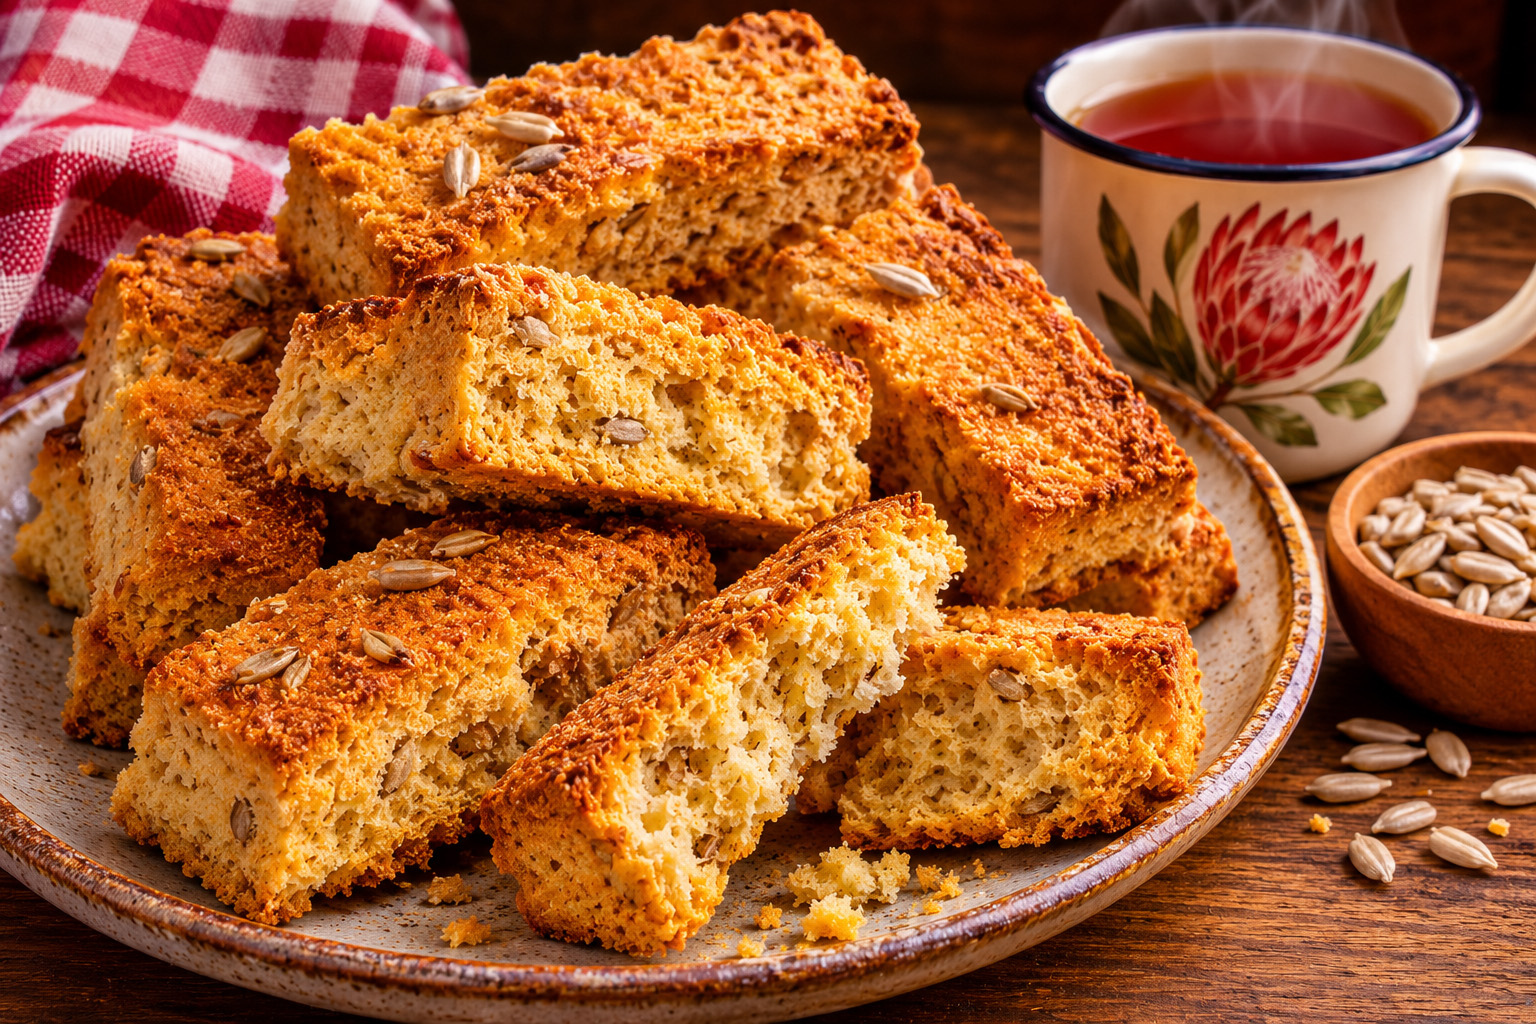
A truly good buttermilk rusk should be golden on the outside, beautifully crisp all the way through and rich with the comforting flavour of homemade baking. The secret is a simple dough made with real buttermilk and butter, followed by patient, slow drying in the oven. These traditional South African rusks are lightly sweet, satisfyingly crunchy and perfect for dipping into a steaming cup of coffee or rooibos tea. With a touch of wholewheat flour and optional sunflower seeds, they bring a little extra goodness to a much-loved family tradition.
Preheat the oven to 180°C (160°C fan-assisted). Lightly grease a large rectangular baking tin, approximately 23 × 33 cm, with butter or oil. Line the base with baking paper if desired, leaving a little overhang to help lift out the baked rusks.
In a large mixing bowl, combine 500 g cake flour, 250 g wholewheat flour, 150 g light brown sugar, 20 g baking powder, 1 teaspoon bicarbonate of soda and 1 teaspoon salt. Mix thoroughly to distribute the raising agents evenly. If using ½ teaspoon ground cinnamon and 75 g sunflower seeds, stir them in now.
In a separate bowl or large jug, whisk together 500 ml buttermilk, 2 large eggs, 200 g melted and cooled butter and 1 teaspoon vanilla extract, if using. Mix until the ingredients are well combined. The butter should be warm rather than hot, so it does not begin cooking the eggs.
Pour the buttermilk mixture into the dry ingredients. Mix gently with a wooden spoon or spatula until no dry flour remains. The dough should be thick, soft and slightly sticky. Avoid excessive mixing, which can make the rusks dense. If the mixture feels very stiff, allow it to rest for a few minutes so the wholewheat flour can absorb the liquid.
Transfer the dough into the prepared baking tin. With lightly floured or damp hands, spread it evenly into the corners and gently smooth the surface. The dough should form an even layer so that the rusks bake consistently. Do not compress it excessively.
Place the tin on the middle oven rack and bake for approximately 40–50 minutes, or until the top is golden brown and a skewer inserted into the center comes out without wet dough. If the top browns too quickly, cover it loosely with foil for the remaining baking time. A deeper layer of dough may need additional time.
Remove the tin from the oven and allow the baked loaf to cool for approximately 15–20 minutes. Carefully lift it out and place it on a cutting board. While still slightly warm, use a sharp serrated knife to cut it into approximately 30–36 rectangular fingers. Handle gently to prevent crumbling.
Reduce the oven temperature to 90°C (80°C fan-assisted). Arrange the cut rusks on wire racks or baking trays, leaving small spaces between them for air circulation. Return to the oven and dry for approximately 3–5 hours, turning halfway if using solid trays. The rusks are ready when completely dry and crisp through the center, with no soft or moist areas remaining.
Switch off the oven and allow the rusks to cool completely on wire racks. Break one open to check that the center is dry and crisp. Transfer to a clean, completely dry airtight container only once fully cooled. Serve with freshly brewed coffee or rooibos tea, dipping each golden rusk into your warm drink for the traditional South African experience.
**The secret to crunchy rusks: ** The second, low-temperature drying stage is essential. The rusks must be completely dry throughout before storing, otherwise they may soften or spoil. **Buttermilk makes the difference: ** Real buttermilk adds a gentle tang and helps create a tender crumb during the first bake. The bicarbonate of soda reacts with its acidity to help the dough rise. **A wholesome touch: ** Combining cake flour with wholewheat flour adds fibre while maintaining a familiar homemade texture. Optional sunflower seeds contribute extra crunch and flavor. **Avoid overmixing: ** Mix the wet and dry ingredients only until combined. Excessive mixing can produce heavy, tough rusks. **Watch the first bake: ** Oven temperatures vary. Check the Centre with a skewer before removing the loaf. If the top becomes too dark, loosely cover it with foil. **Dry them patiently: ** Spread the cut rusks apart to allow warm air to circulate. Thicker rusks may take longer than five hours. They should feel hard and crisp, not soft in the middle. **Storage: ** Once completely cool and dry, store in an airtight container in a cool, dry cupboard. Check periodically for moisture or softening. Discard any rusks showing mould or spoilage. **Serving suggestion: ** Enjoy with rooibos tea, freshly brewed coffee or warm milk. One or two rusks make a satisfying accompaniment to a morning drink.
There is nothing quite like the sharp, spicy flavour of homemade green mango atchar. In South African kitchens, atchar is more than a condiment. It is the little extra that transforms a simple meal into something unforgettable, bringing heat, tanginess and a wonderful burst of flavour to every bite. Made with firm, unripe mangoes, fragrant mustard seeds, warming spices, fresh garlic and ginger, this homemade atchar is packed with character. Whether spooned onto a freshly made kota, served alongside a rich Durban curry or enjoyed with warm roti, its crunchy texture and bold masala flavor make it a favorite worth keeping in the fridge. A little goes a long way, but the taste will have you coming back for more.
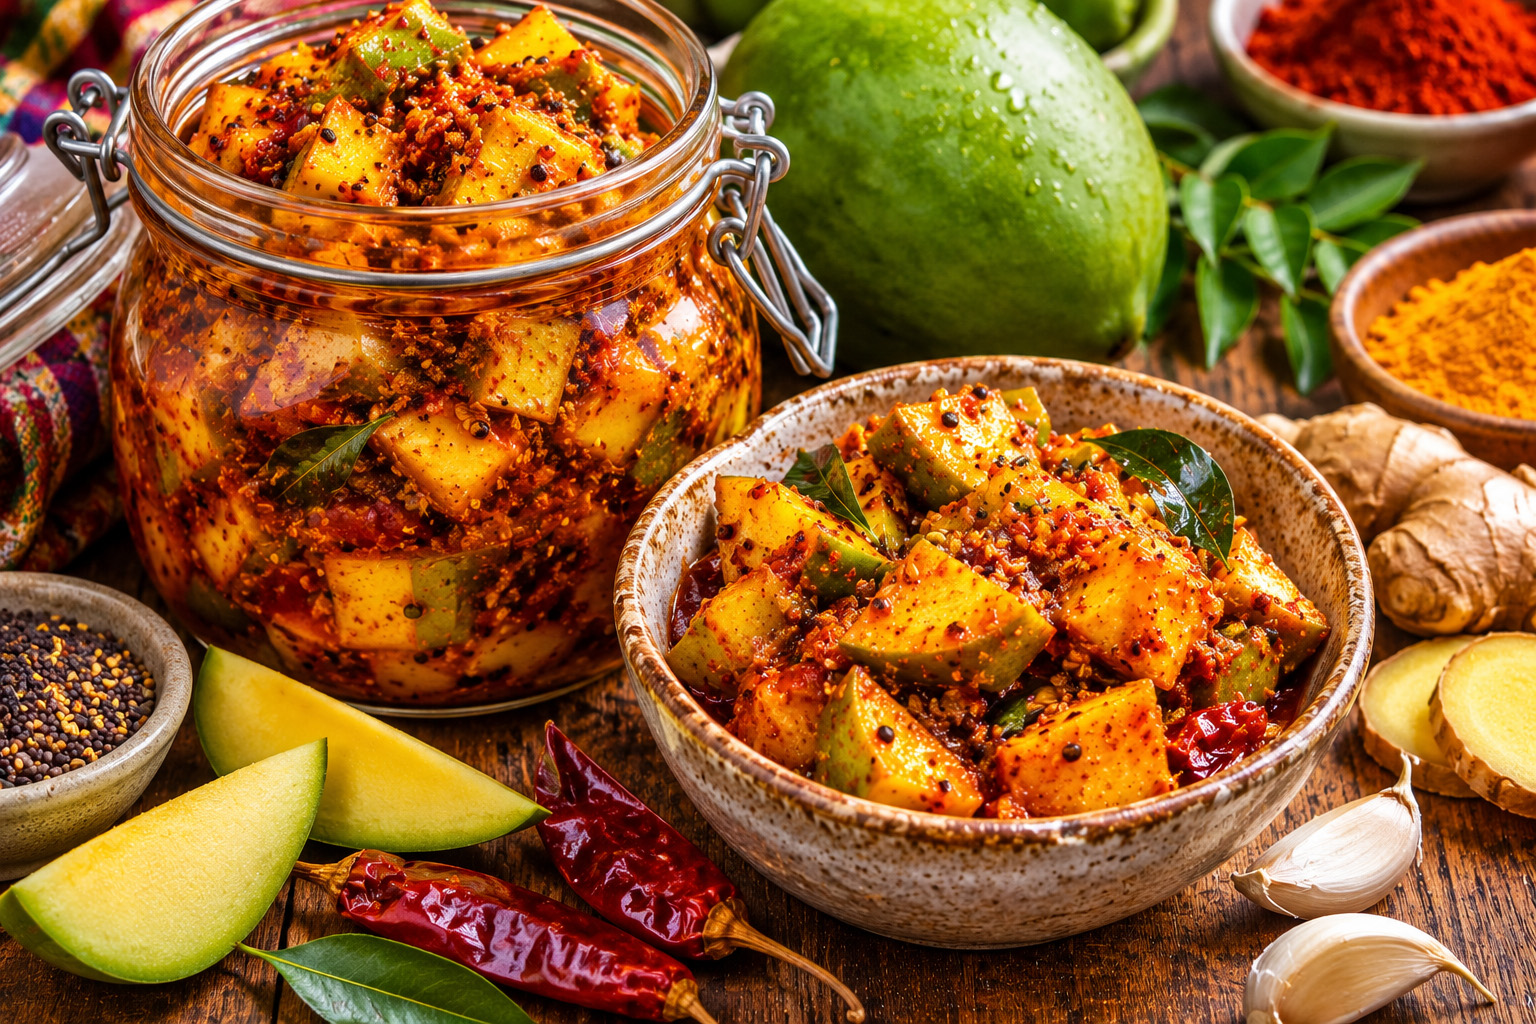
The secret to delicious homemade green mango atchar lies in the perfect balance of tanginess, heat and aromatic spices. Firm, unripe mangoes provide that wonderful crunch, while mustard seeds, fenugreek, turmeric, chilli, garlic and ginger create the bold masala flavour that makes South African atchar so irresistible. As the spices release their fragrance and coat the mango pieces, the kitchen fills with a delicious aroma. After a little time in the refrigerator, the flavors come together beautifully, creating a vibrant condiment that transforms everything from a simple sandwich to a hearty Durban curry or a freshly made kasi kota.
Wash 750 g firm, unripe green mangoes thoroughly under running water. Peel if preferred, remove the stones and cut the flesh into small, even-sized chunks or thin strips. Pat the mango pieces dry with clean kitchen paper to remove excess surface moisture.
Place the prepared mango pieces in a large, clean mixing bowl. Add 1 teaspoon salt and 2 tablespoons white vinegar (5% acidity). Toss thoroughly until evenly coated. Set aside for approximately 15–20 minutes while preparing the spices. Retain the liquid released by the mangoes.
In a small bowl, combine 1 teaspoon ground turmeric, 1 tablespoon Kashmiri chili powder, 1 teaspoon ground coriander and ½ teaspoon ground cumin. Add 1 teaspoon crushed chili flakes if using. Mix thoroughly and set aside. Keep the mustard seeds, fenugreek seeds and curry leaves separate for tempering.
Heat 2 tablespoons sunflower oil in a heavy-bottomed saucepan over medium-low heat. Add 1 tablespoon mustard seeds and 1 teaspoon fenugreek seeds. Stir gently for approximately 30–60 seconds until the mustard seeds begin to pop and the spices become fragrant. Reduce the heat immediately if the seeds begin to darken too quickly.
Carefully add 4 finely crushed garlic cloves, 1 tablespoon grated fresh ginger and 8–10 fresh curry leaves to the warm oil. The mixture may splutter, so keep your face and hands away from the pot. Stir over low heat for approximately 1–2 minutes until fragrant, without allowing the garlic to burn.
Remove the saucepan from the heat. Add the prepared dry spice mixture and stir until the oil and aromatics form a fragrant masala paste. If the spices appear too dry, add a small spoonful of liquid from the seasoned mangoes. Return to very low heat for approximately 30 seconds, stirring continuously, then remove from the heat.
Add the seasoned green mango pieces and their retained liquid to the warm masala mixture. Stir thoroughly until every piece is coated. Add the remaining 2 tablespoons white vinegar (5% acidity) and ½ teaspoon sugar if using. Return to low heat and cook gently for approximately 3–5 minutes, stirring frequently. The mangoes should remain firm and crunchy rather than becoming soft.
Remove the saucepan from the heat and allow the atchar to cool promptly. Taste and adjust the salt if needed. Transfer into clean, dry, food-safe glass jars using clean utensils. Close with tight-fitting lids and refrigerate within 2 hours of cooking. Do not leave the atchar at room temperature to mature.
Refrigerate the atchar for approximately 24–48 hours to allow the flavors to develop. Stir with a clean spoon before serving. Enjoy a small portion alongside Durban curry, homemade roti, rice, sandwiches or a classic South African kota. Always return the jar to the refrigerator immediately after use.
**Choose firm green mangoes: ** Unripe mangoes have the sharp, tangy flavor and firm texture needed for traditional atchar. Avoid soft or fully ripe mangoes, which can become mushy. **The secret to bold flavor: ** Mustard seeds, fenugreek, turmeric, Kashmiri chili, garlic, ginger and curry leaves create the distinctive South African atchar masala. Gently temper the whole spices to release their fragrance without burning them. **Keep the mangoes crunchy: ** Cook the mango pieces only briefly. Overcooking will soften them and reduce the characteristic crunch. **Control the heat: ** Kashmiri chili powder adds color and warmth, while optional crushed chili flakes increase the heat. Adjust the chili according to your preference. **Use oil moderately: ** Two tablespoons of sunflower oil help distribute the spices without making the atchar excessively oily. This recipe is not intended for traditional oil-preserved, room-temperature storage. **Important food safety: ** This is a fresh, refrigerated atchar, not a tested shelf-stable preserve. The vinegar, oil and salt quantities do not make it safe for unrefrigerated storage. Keep refrigerated at 4°C or below, use clean utensils and never store at room temperature. Because this is an unvalidated homemade recipe containing fresh garlic and oil, use within 3–4 days after preparation, including the flavor-development period, or freeze promptly in suitable portions. Discard if storage conditions are uncertain; do not rely on smell or appearance alone.
Chapter 1 is free. Unlock Chapters 2–10 to enjoy the remaining 90 South African recipes.
Buy now to continueChapter 1 is free. Unlock Chapters 2–10 to enjoy the remaining 90 South African recipes.
Buy now to continueChapter 1 is free. Unlock Chapters 2–10 to enjoy the remaining 90 South African recipes.
Buy now to continueChapter 1 is free. Unlock Chapters 2–10 to enjoy the remaining 90 South African recipes.
Buy now to continueChapter 1 is free. Unlock Chapters 2–10 to enjoy the remaining 90 South African recipes.
Buy now to continueChapter 1 is free. Unlock Chapters 2–10 to enjoy the remaining 90 South African recipes.
Buy now to continueChapter 1 is free. Unlock Chapters 2–10 to enjoy the remaining 90 South African recipes.
Buy now to continueChapter 1 is free. Unlock Chapters 2–10 to enjoy the remaining 90 South African recipes.
Buy now to continueChapter 1 is free. Unlock Chapters 2–10 to enjoy the remaining 90 South African recipes.
Buy now to continueChapter 1 is free. Unlock Chapters 2–10 to enjoy the remaining 90 South African recipes.
Buy now to continueChapter 1 is free. Unlock Chapters 2–10 to enjoy the remaining 90 South African recipes.
Buy now to continueChapter 1 is free. Unlock Chapters 2–10 to enjoy the remaining 90 South African recipes.
Buy now to continueChapter 1 is free. Unlock Chapters 2–10 to enjoy the remaining 90 South African recipes.
Buy now to continueChapter 1 is free. Unlock Chapters 2–10 to enjoy the remaining 90 South African recipes.
Buy now to continueChapter 1 is free. Unlock Chapters 2–10 to enjoy the remaining 90 South African recipes.
Buy now to continueChapter 1 is free. Unlock Chapters 2–10 to enjoy the remaining 90 South African recipes.
Buy now to continueChapter 1 is free. Unlock Chapters 2–10 to enjoy the remaining 90 South African recipes.
Buy now to continueChapter 1 is free. Unlock Chapters 2–10 to enjoy the remaining 90 South African recipes.
Buy now to continueChapter 1 is free. Unlock Chapters 2–10 to enjoy the remaining 90 South African recipes.
Buy now to continueChapter 1 is free. Unlock Chapters 2–10 to enjoy the remaining 90 South African recipes.
Buy now to continueChapter 1 is free. Unlock Chapters 2–10 to enjoy the remaining 90 South African recipes.
Buy now to continueChapter 1 is free. Unlock Chapters 2–10 to enjoy the remaining 90 South African recipes.
Buy now to continueChapter 1 is free. Unlock Chapters 2–10 to enjoy the remaining 90 South African recipes.
Buy now to continueChapter 1 is free. Unlock Chapters 2–10 to enjoy the remaining 90 South African recipes.
Buy now to continueChapter 1 is free. Unlock Chapters 2–10 to enjoy the remaining 90 South African recipes.
Buy now to continueChapter 1 is free. Unlock Chapters 2–10 to enjoy the remaining 90 South African recipes.
Buy now to continueChapter 1 is free. Unlock Chapters 2–10 to enjoy the remaining 90 South African recipes.
Buy now to continueChapter 1 is free. Unlock Chapters 2–10 to enjoy the remaining 90 South African recipes.
Buy now to continueChapter 1 is free. Unlock Chapters 2–10 to enjoy the remaining 90 South African recipes.
Buy now to continueChapter 1 is free. Unlock Chapters 2–10 to enjoy the remaining 90 South African recipes.
Buy now to continueChapter 1 is free. Unlock Chapters 2–10 to enjoy the remaining 90 South African recipes.
Buy now to continueChapter 1 is free. Unlock Chapters 2–10 to enjoy the remaining 90 South African recipes.
Buy now to continueChapter 1 is free. Unlock Chapters 2–10 to enjoy the remaining 90 South African recipes.
Buy now to continueChapter 1 is free. Unlock Chapters 2–10 to enjoy the remaining 90 South African recipes.
Buy now to continueChapter 1 is free. Unlock Chapters 2–10 to enjoy the remaining 90 South African recipes.
Buy now to continueChapter 1 is free. Unlock Chapters 2–10 to enjoy the remaining 90 South African recipes.
Buy now to continueChapter 1 is free. Unlock Chapters 2–10 to enjoy the remaining 90 South African recipes.
Buy now to continueChapter 1 is free. Unlock Chapters 2–10 to enjoy the remaining 90 South African recipes.
Buy now to continueChapter 1 is free. Unlock Chapters 2–10 to enjoy the remaining 90 South African recipes.
Buy now to continueChapter 1 is free. Unlock Chapters 2–10 to enjoy the remaining 90 South African recipes.
Buy now to continueChapter 1 is free. Unlock Chapters 2–10 to enjoy the remaining 90 South African recipes.
Buy now to continueChapter 1 is free. Unlock Chapters 2–10 to enjoy the remaining 90 South African recipes.
Buy now to continueChapter 1 is free. Unlock Chapters 2–10 to enjoy the remaining 90 South African recipes.
Buy now to continueChapter 1 is free. Unlock Chapters 2–10 to enjoy the remaining 90 South African recipes.
Buy now to continueChapter 1 is free. Unlock Chapters 2–10 to enjoy the remaining 90 South African recipes.
Buy now to continueChapter 1 is free. Unlock Chapters 2–10 to enjoy the remaining 90 South African recipes.
Buy now to continueChapter 1 is free. Unlock Chapters 2–10 to enjoy the remaining 90 South African recipes.
Buy now to continueChapter 1 is free. Unlock Chapters 2–10 to enjoy the remaining 90 South African recipes.
Buy now to continueChapter 1 is free. Unlock Chapters 2–10 to enjoy the remaining 90 South African recipes.
Buy now to continueChapter 1 is free. Unlock Chapters 2–10 to enjoy the remaining 90 South African recipes.
Buy now to continueChapter 1 is free. Unlock Chapters 2–10 to enjoy the remaining 90 South African recipes.
Buy now to continueChapter 1 is free. Unlock Chapters 2–10 to enjoy the remaining 90 South African recipes.
Buy now to continueChapter 1 is free. Unlock Chapters 2–10 to enjoy the remaining 90 South African recipes.
Buy now to continueChapter 1 is free. Unlock Chapters 2–10 to enjoy the remaining 90 South African recipes.
Buy now to continueChapter 1 is free. Unlock Chapters 2–10 to enjoy the remaining 90 South African recipes.
Buy now to continueChapter 1 is free. Unlock Chapters 2–10 to enjoy the remaining 90 South African recipes.
Buy now to continueChapter 1 is free. Unlock Chapters 2–10 to enjoy the remaining 90 South African recipes.
Buy now to continueChapter 1 is free. Unlock Chapters 2–10 to enjoy the remaining 90 South African recipes.
Buy now to continueChapter 1 is free. Unlock Chapters 2–10 to enjoy the remaining 90 South African recipes.
Buy now to continueChapter 1 is free. Unlock Chapters 2–10 to enjoy the remaining 90 South African recipes.
Buy now to continueChapter 1 is free. Unlock Chapters 2–10 to enjoy the remaining 90 South African recipes.
Buy now to continueChapter 1 is free. Unlock Chapters 2–10 to enjoy the remaining 90 South African recipes.
Buy now to continueChapter 1 is free. Unlock Chapters 2–10 to enjoy the remaining 90 South African recipes.
Buy now to continueChapter 1 is free. Unlock Chapters 2–10 to enjoy the remaining 90 South African recipes.
Buy now to continueChapter 1 is free. Unlock Chapters 2–10 to enjoy the remaining 90 South African recipes.
Buy now to continueChapter 1 is free. Unlock Chapters 2–10 to enjoy the remaining 90 South African recipes.
Buy now to continueChapter 1 is free. Unlock Chapters 2–10 to enjoy the remaining 90 South African recipes.
Buy now to continueChapter 1 is free. Unlock Chapters 2–10 to enjoy the remaining 90 South African recipes.
Buy now to continueChapter 1 is free. Unlock Chapters 2–10 to enjoy the remaining 90 South African recipes.
Buy now to continueChapter 1 is free. Unlock Chapters 2–10 to enjoy the remaining 90 South African recipes.
Buy now to continueChapter 1 is free. Unlock Chapters 2–10 to enjoy the remaining 90 South African recipes.
Buy now to continueChapter 1 is free. Unlock Chapters 2–10 to enjoy the remaining 90 South African recipes.
Buy now to continueChapter 1 is free. Unlock Chapters 2–10 to enjoy the remaining 90 South African recipes.
Buy now to continueChapter 1 is free. Unlock Chapters 2–10 to enjoy the remaining 90 South African recipes.
Buy now to continueChapter 1 is free. Unlock Chapters 2–10 to enjoy the remaining 90 South African recipes.
Buy now to continueChapter 1 is free. Unlock Chapters 2–10 to enjoy the remaining 90 South African recipes.
Buy now to continueChapter 1 is free. Unlock Chapters 2–10 to enjoy the remaining 90 South African recipes.
Buy now to continueChapter 1 is free. Unlock Chapters 2–10 to enjoy the remaining 90 South African recipes.
Buy now to continueChapter 1 is free. Unlock Chapters 2–10 to enjoy the remaining 90 South African recipes.
Buy now to continueChapter 1 is free. Unlock Chapters 2–10 to enjoy the remaining 90 South African recipes.
Buy now to continueChapter 1 is free. Unlock Chapters 2–10 to enjoy the remaining 90 South African recipes.
Buy now to continueChapter 1 is free. Unlock Chapters 2–10 to enjoy the remaining 90 South African recipes.
Buy now to continueChapter 1 is free. Unlock Chapters 2–10 to enjoy the remaining 90 South African recipes.
Buy now to continueChapter 1 is free. Unlock Chapters 2–10 to enjoy the remaining 90 South African recipes.
Buy now to continueChapter 1 is free. Unlock Chapters 2–10 to enjoy the remaining 90 South African recipes.
Buy now to continueChapter 1 is free. Unlock Chapters 2–10 to enjoy the remaining 90 South African recipes.
Buy now to continueChapter 1 is free. Unlock Chapters 2–10 to enjoy the remaining 90 South African recipes.
Buy now to continueChapter 1 is free. Unlock Chapters 2–10 to enjoy the remaining 90 South African recipes.
Buy now to continueChapter 1 is free. Unlock Chapters 2–10 to enjoy the remaining 90 South African recipes.
Buy now to continueChapter 1 is free. Unlock Chapters 2–10 to enjoy the remaining 90 South African recipes.
Buy now to continueChapter 1 is free. Unlock Chapters 2–10 to enjoy the remaining 90 South African recipes.
Buy now to continueChapter 1 is free. Unlock Chapters 2–10 to enjoy the remaining 90 South African recipes.
Buy now to continueChapter 1 is free. Unlock Chapters 2–10 to enjoy the remaining 90 South African recipes.
Buy now to continueChapter 1 is free. Unlock Chapters 2–10 to enjoy the remaining 90 South African recipes.
Buy now to continueChapter 1 is free. Unlock Chapters 2–10 to enjoy the remaining 90 South African recipes.
Buy now to continueChapter 1 is free. Unlock Chapters 2–10 to enjoy the remaining 90 South African recipes.
Buy now to continueChapter 1 is free. Unlock Chapters 2–10 to enjoy the remaining 90 South African recipes.
Buy now to continueChapter 1 is free. Unlock Chapters 2–10 to enjoy the remaining 90 South African recipes.
Buy now to continueChapter 1 is free. Unlock Chapters 2–10 to enjoy the remaining 90 South African recipes.
Buy now to continueChapter 1 is free. Unlock Chapters 2–10 to enjoy the remaining 90 South African recipes.
Buy now to continueChapter 1 is free. Unlock Chapters 2–10 to enjoy the remaining 90 South African recipes.
Buy now to continueChapter 1 is free. Unlock Chapters 2–10 to enjoy the remaining 90 South African recipes.
Buy now to continueChapter 1 is free. Unlock Chapters 2–10 to enjoy the remaining 90 South African recipes.
Buy now to continueChapter 1 is free. Unlock Chapters 2–10 to enjoy the remaining 90 South African recipes.
Buy now to continueChapter 1 is free. Unlock Chapters 2–10 to enjoy the remaining 90 South African recipes.
Buy now to continueChapter 1 is free. Unlock Chapters 2–10 to enjoy the remaining 90 South African recipes.
Buy now to continueChapter 1 is free. Unlock Chapters 2–10 to enjoy the remaining 90 South African recipes.
Buy now to continueChapter 1 is free. Unlock Chapters 2–10 to enjoy the remaining 90 South African recipes.
Buy now to continueChapter 1 is free. Unlock Chapters 2–10 to enjoy the remaining 90 South African recipes.
Buy now to continueChapter 1 is free. Unlock Chapters 2–10 to enjoy the remaining 90 South African recipes.
Buy now to continueChapter 1 is free. Unlock Chapters 2–10 to enjoy the remaining 90 South African recipes.
Buy now to continueChapter 1 is free. Unlock Chapters 2–10 to enjoy the remaining 90 South African recipes.
Buy now to continueChapter 1 is free. Unlock Chapters 2–10 to enjoy the remaining 90 South African recipes.
Buy now to continueChapter 1 is free. Unlock Chapters 2–10 to enjoy the remaining 90 South African recipes.
Buy now to continueChapter 1 is free. Unlock Chapters 2–10 to enjoy the remaining 90 South African recipes.
Buy now to continueChapter 1 is free. Unlock Chapters 2–10 to enjoy the remaining 90 South African recipes.
Buy now to continueChapter 1 is free. Unlock Chapters 2–10 to enjoy the remaining 90 South African recipes.
Buy now to continueChapter 1 is free. Unlock Chapters 2–10 to enjoy the remaining 90 South African recipes.
Buy now to continueChapter 1 is free. Unlock Chapters 2–10 to enjoy the remaining 90 South African recipes.
Buy now to continueChapter 1 is free. Unlock Chapters 2–10 to enjoy the remaining 90 South African recipes.
Buy now to continueChapter 1 is free. Unlock Chapters 2–10 to enjoy the remaining 90 South African recipes.
Buy now to continueChapter 1 is free. Unlock Chapters 2–10 to enjoy the remaining 90 South African recipes.
Buy now to continueChapter 1 is free. Unlock Chapters 2–10 to enjoy the remaining 90 South African recipes.
Buy now to continueChapter 1 is free. Unlock Chapters 2–10 to enjoy the remaining 90 South African recipes.
Buy now to continueChapter 1 is free. Unlock Chapters 2–10 to enjoy the remaining 90 South African recipes.
Buy now to continueChapter 1 is free. Unlock Chapters 2–10 to enjoy the remaining 90 South African recipes.
Buy now to continueChapter 1 is free. Unlock Chapters 2–10 to enjoy the remaining 90 South African recipes.
Buy now to continueChapter 1 is free. Unlock Chapters 2–10 to enjoy the remaining 90 South African recipes.
Buy now to continueChapter 1 is free. Unlock Chapters 2–10 to enjoy the remaining 90 South African recipes.
Buy now to continueChapter 1 is free. Unlock Chapters 2–10 to enjoy the remaining 90 South African recipes.
Buy now to continueChapter 1 is free. Unlock Chapters 2–10 to enjoy the remaining 90 South African recipes.
Buy now to continueChapter 1 is free. Unlock Chapters 2–10 to enjoy the remaining 90 South African recipes.
Buy now to continueChapter 1 is free. Unlock Chapters 2–10 to enjoy the remaining 90 South African recipes.
Buy now to continueChapter 1 is free. Unlock Chapters 2–10 to enjoy the remaining 90 South African recipes.
Buy now to continueChapter 1 is free. Unlock Chapters 2–10 to enjoy the remaining 90 South African recipes.
Buy now to continueChapter 1 is free. Unlock Chapters 2–10 to enjoy the remaining 90 South African recipes.
Buy now to continueChapter 1 is free. Unlock Chapters 2–10 to enjoy the remaining 90 South African recipes.
Buy now to continueChapter 1 is free. Unlock Chapters 2–10 to enjoy the remaining 90 South African recipes.
Buy now to continueChapter 1 is free. Unlock Chapters 2–10 to enjoy the remaining 90 South African recipes.
Buy now to continueChapter 1 is free. Unlock Chapters 2–10 to enjoy the remaining 90 South African recipes.
Buy now to continueChapter 1 is free. Unlock Chapters 2–10 to enjoy the remaining 90 South African recipes.
Buy now to continueChapter 1 is free. Unlock Chapters 2–10 to enjoy the remaining 90 South African recipes.
Buy now to continueChapter 1 is free. Unlock Chapters 2–10 to enjoy the remaining 90 South African recipes.
Buy now to continueChapter 1 is free. Unlock Chapters 2–10 to enjoy the remaining 90 South African recipes.
Buy now to continueChapter 1 is free. Unlock Chapters 2–10 to enjoy the remaining 90 South African recipes.
Buy now to continueChapter 1 is free. Unlock Chapters 2–10 to enjoy the remaining 90 South African recipes.
Buy now to continueChapter 1 is free. Unlock Chapters 2–10 to enjoy the remaining 90 South African recipes.
Buy now to continueChapter 1 is free. Unlock Chapters 2–10 to enjoy the remaining 90 South African recipes.
Buy now to continueChapter 1 is free. Unlock Chapters 2–10 to enjoy the remaining 90 South African recipes.
Buy now to continueChapter 1 is free. Unlock Chapters 2–10 to enjoy the remaining 90 South African recipes.
Buy now to continueChapter 1 is free. Unlock Chapters 2–10 to enjoy the remaining 90 South African recipes.
Buy now to continueChapter 1 is free. Unlock Chapters 2–10 to enjoy the remaining 90 South African recipes.
Buy now to continueChapter 1 is free. Unlock Chapters 2–10 to enjoy the remaining 90 South African recipes.
Buy now to continueChapter 1 is free. Unlock Chapters 2–10 to enjoy the remaining 90 South African recipes.
Buy now to continueChapter 1 is free. Unlock Chapters 2–10 to enjoy the remaining 90 South African recipes.
Buy now to continueChapter 1 is free. Unlock Chapters 2–10 to enjoy the remaining 90 South African recipes.
Buy now to continueChapter 1 is free. Unlock Chapters 2–10 to enjoy the remaining 90 South African recipes.
Buy now to continueChapter 1 is free. Unlock Chapters 2–10 to enjoy the remaining 90 South African recipes.
Buy now to continueChapter 1 is free. Unlock Chapters 2–10 to enjoy the remaining 90 South African recipes.
Buy now to continueChapter 1 is free. Unlock Chapters 2–10 to enjoy the remaining 90 South African recipes.
Buy now to continueChapter 1 is free. Unlock Chapters 2–10 to enjoy the remaining 90 South African recipes.
Buy now to continueChapter 1 is free. Unlock Chapters 2–10 to enjoy the remaining 90 South African recipes.
Buy now to continueChapter 1 is free. Unlock Chapters 2–10 to enjoy the remaining 90 South African recipes.
Buy now to continueChapter 1 is free. Unlock Chapters 2–10 to enjoy the remaining 90 South African recipes.
Buy now to continueChapter 1 is free. Unlock Chapters 2–10 to enjoy the remaining 90 South African recipes.
Buy now to continueChapter 1 is free. Unlock Chapters 2–10 to enjoy the remaining 90 South African recipes.
Buy now to continueChapter 1 is free. Unlock Chapters 2–10 to enjoy the remaining 90 South African recipes.
Buy now to continueChapter 1 is free. Unlock Chapters 2–10 to enjoy the remaining 90 South African recipes.
Buy now to continueChapter 1 is free. Unlock Chapters 2–10 to enjoy the remaining 90 South African recipes.
Buy now to continueChapter 1 is free. Unlock Chapters 2–10 to enjoy the remaining 90 South African recipes.
Buy now to continueChapter 1 is free. Unlock Chapters 2–10 to enjoy the remaining 90 South African recipes.
Buy now to continueChapter 1 is free. Unlock Chapters 2–10 to enjoy the remaining 90 South African recipes.
Buy now to continueChapter 1 is free. Unlock Chapters 2–10 to enjoy the remaining 90 South African recipes.
Buy now to continueChapter 1 is free. Unlock Chapters 2–10 to enjoy the remaining 90 South African recipes.
Buy now to continueChapter 1 is free. Unlock Chapters 2–10 to enjoy the remaining 90 South African recipes.
Buy now to continueChapter 1 is free. Unlock Chapters 2–10 to enjoy the remaining 90 South African recipes.
Buy now to continueChapter 1 is free. Unlock Chapters 2–10 to enjoy the remaining 90 South African recipes.
Buy now to continueChapter 1 is free. Unlock Chapters 2–10 to enjoy the remaining 90 South African recipes.
Buy now to continueChapter 1 is free. Unlock Chapters 2–10 to enjoy the remaining 90 South African recipes.
Buy now to continueChapter 1 is free. Unlock Chapters 2–10 to enjoy the remaining 90 South African recipes.
Buy now to continueChapter 1 is free. Unlock Chapters 2–10 to enjoy the remaining 90 South African recipes.
Buy now to continueChapter 1 is free. Unlock Chapters 2–10 to enjoy the remaining 90 South African recipes.
Buy now to continueChapter 1 is free. Unlock Chapters 2–10 to enjoy the remaining 90 South African recipes.
Buy now to continue